

As Laravel programmers, we’re often asked to add content management to our existing applications, usually to power the marketing website for an app we’re building. There are a host of different CMSes we can reach for, or we can instead use tools like Laravel Nova to build out rudimentary content management.
Recently, one of the biggest players in the CMS world, ExpressionEngine—long a beloved tool for businesses and organizations around the world—added support for integrating directly with Laravel applications. Today, we’re going to take a look at how you can easily integrate a new or existing ExpressionEngine site into your Laravel application.
Introducing Coilpack
Coilpack, announced in early 2023, is a new package built by the ExpressionEngine team which enables developers to integrate a new or existing ExpressionEngine site directly into a Laravel application. Coilpack bridges the gap between the two technologies, allowing you to use Twig, Blade, GraphQL, REST, and a suite of other Laravel integrations in your ExpressionEngine apps.
For those who have never used ExpressionEngine, this tutorial will quickly take you through setting up a simple marketing page for a mock notetaking app called “Doodle”.
Table of Contents
Set up a Laravel Application
This post is primarily targeted at Laravel developers, but if you’re new to Laravel, here’s a quick set of steps to spin up a new Laravel app. If you need even more in-depth instructions, check out the Laravel docs for a thorough guide to getting started.
cd ~/Siteslaravel new doodlecd doodlegit initgit add .git commit -m "Initial commit."composer require laravel/breeze --devphp artisan breeze:install # Choose the Blade stack, with dark mode support, and PHPUnit testsgit add .git commit -m "Add Laravel Breeze."# Create a `doodle` database in your local database server... then:php artisan migrateNow you have a fully functioning Laravel application with Breeze for authentication and a migrated database. Let’s move on to the ExpressionEngine portion!
Set up Coilpack
Installing Coilpack is remarkably similar to installing Breeze. Require the package, and run its installation command:
composer require expressionengine/coilpack:1.xphp artisan coilpackThis command will ask you a few questions:
Would you like to install ExpressionEngine or choose an existing installation [install]:[0] install[1] chooseFor this tutorial, we’re creating a brand new EE install for our Laravel app, so let’s choose the first option. However, if you’re adding Laravel to an existing EE application, choose the second option and point Coilpack to your existing app.
Coilpack will now automatically download and install ExpressionEngine into an ee folder in your Laravel app—e.g. ~/Sites/doodle/ee.
Finally, let's ignore a few directories in the ee folder. Add the following two lines to the .gitignore file at the root of the Laravel application:
ee/system/user/cache/*ee/system/user/logs/*Let’s do a Git commit, so we can add the new Composer dependency, the config/coilpack.php config file, and the entire ee/ directory:
git add .git commit -m "Install Coilpack."Install ExpressionEngine
Now, let’s visit ExpressionEngine’s admin page to finish configuring our new install. If you’re using a tool like Laravel Valet, that URL will be http://doodle.test/admin.php.
Before finishing the ExpressionEngine install, make sure you’ve created a database for your app.
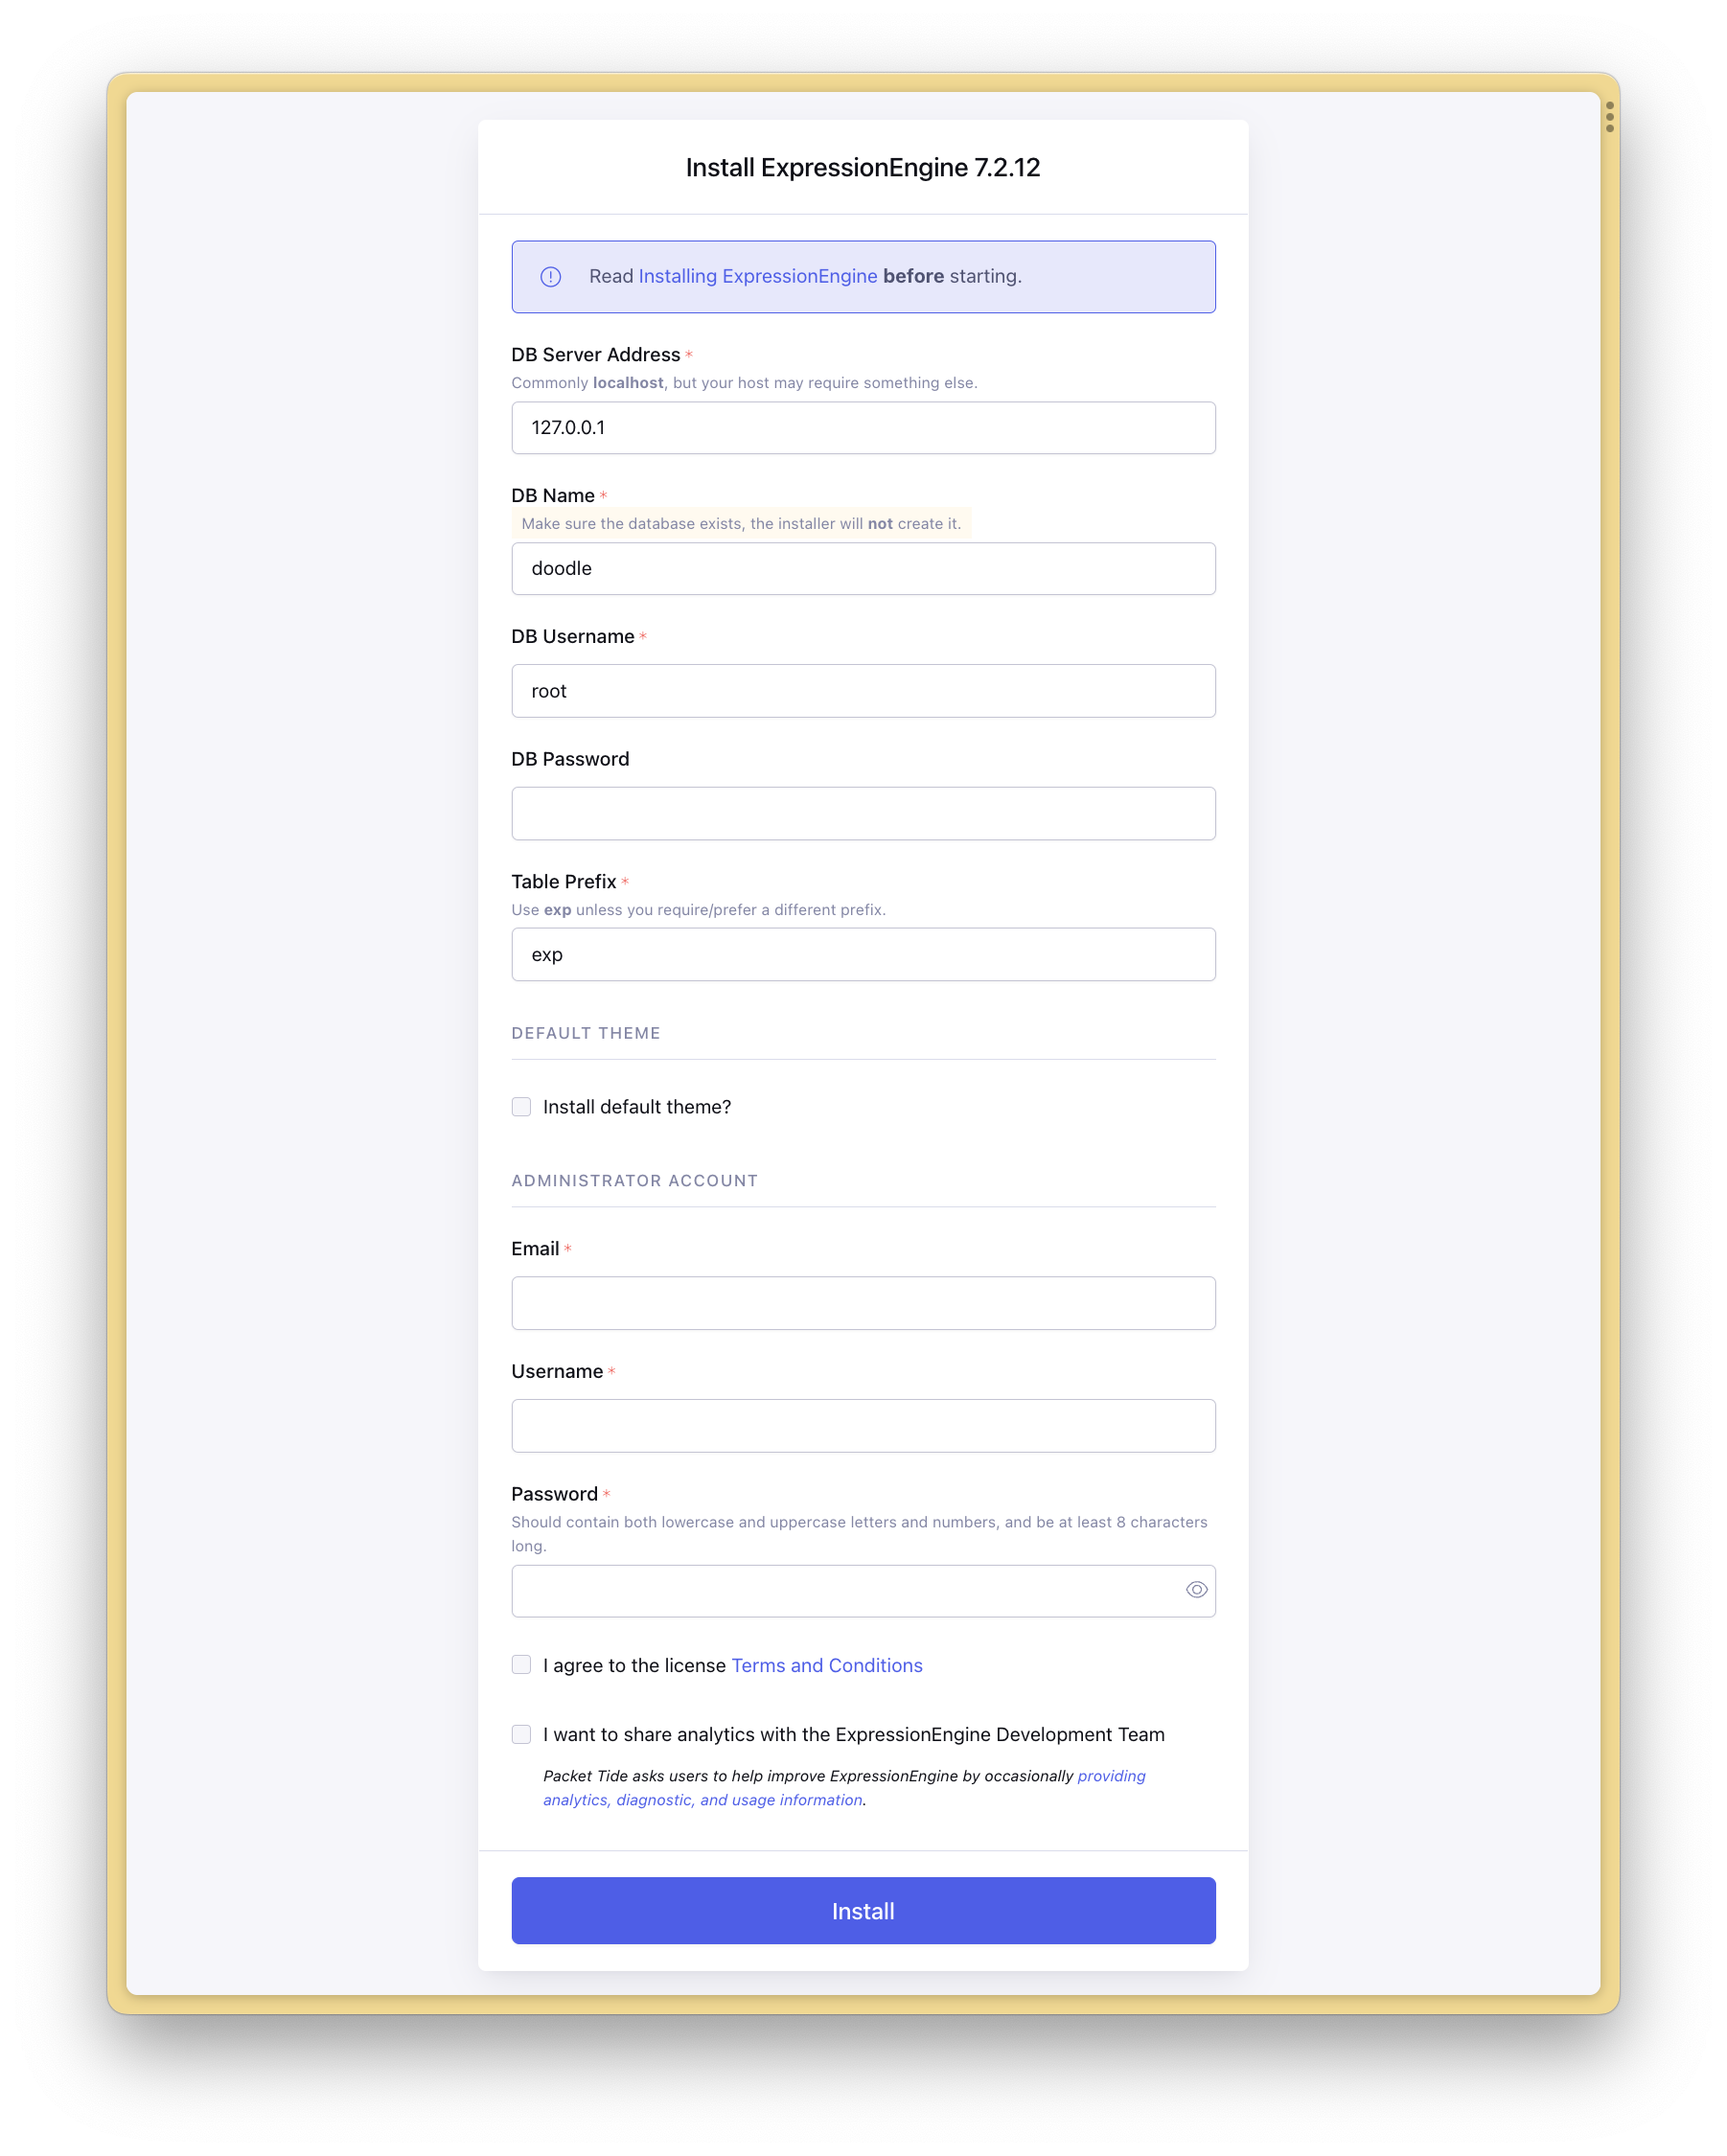
The default database settings EE ships with are correct for many local database installs, so you may only need to fill out the Administrator Account section and then you’ll be good to go. You can leave "Install default theme?" unchecked for this tutorial.
Once you’ve filled that form out, visit http://doodle.test in the browser, and you should see a notice indicating that ExpressionEngine was installed correctly. Great! Now, we can move forward with setting up our site—but first, let’s commit the file changes we just made: git add . && git commit -m "Install EE via Coilpack."
Note to Valet users: If no styles are loading when you open up the admin page, check to make sure that your
APP_URLin.envis not set tohttp://localhost, but rather to the URL you are using locally. For me, that URL ishttp://doodle.test.
Set up ExpressionEngine
Now that we have a sparkly new ExpressionEngine install inside our Laravel application (via Coilpack), we need to turn our ExpressionEngine site into something real. Let’s log into the control panel and get configuring!
If you want to learn more deeply about how each of these features work, check out ExpressionEngine University, but for now we’ll just breeze through some basic settings.
What we’re building
As with most marketing sites, our site will have a few different types of content; some will be structured, like FAQ items, and others will be more loosely defined, like paragraphs of text on the home page.
We’ll build containers (“channels”) for each of these types of content, add entries within each container, and then create Blade templates to render the marketing site itself.
Here’s a template for a rudimentary version of the site we’ll build in this blog post, containing just a header, a subheader, a page title, and a list of FAQs that we’ll be powering with EE.
Basic settings
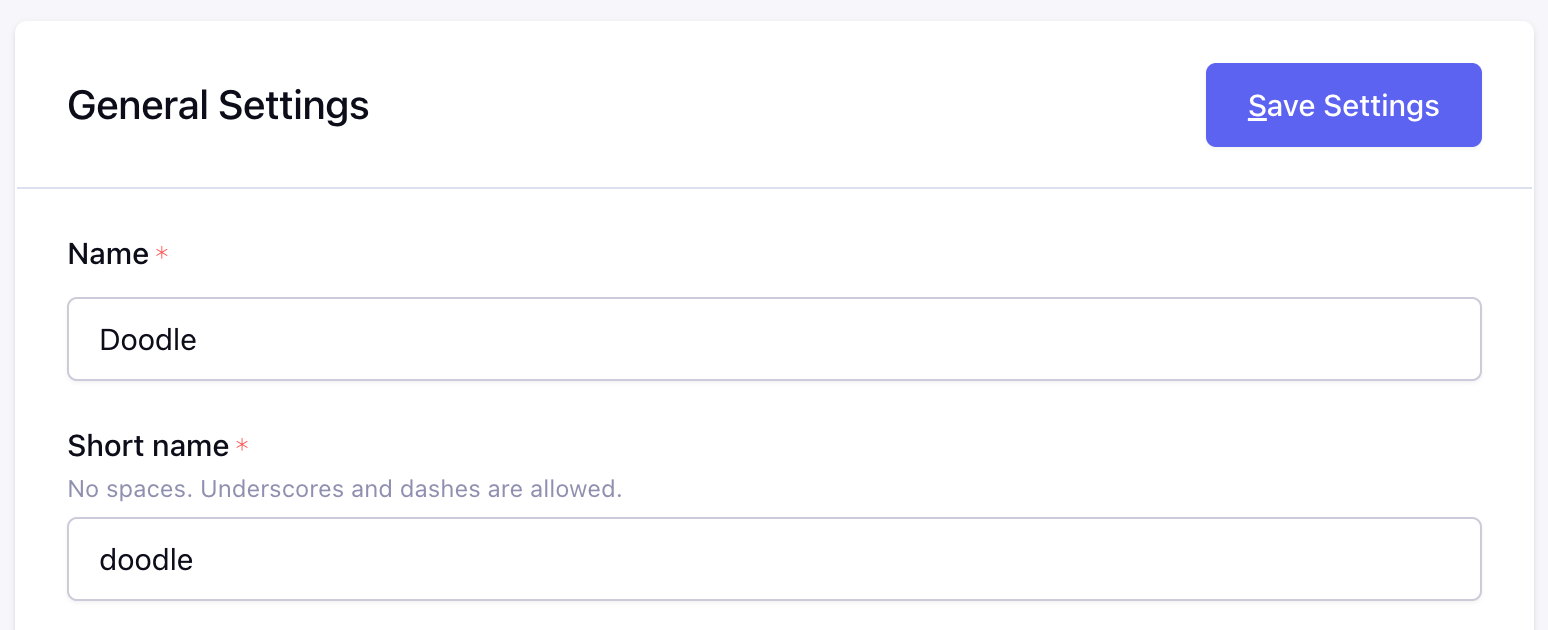
When you first open the control panel, you’ll notice a green button with "Name your site" written on it. Clicking this brings you to General Settings, where you can set up the basic details of your site.
Creating channels
Now, let’s create a few channels for our content. For the sake of this tutorial, we’ll create just a few channels, but a full marketing site for Doodle would certainly have more channels, including blog posts, testimonials, and more.
To add a channel, click on “Channels” in the left nav, under “DEVELOPER”, and click the “New Channel” button. Here are the channels we’ll create for now:
A “Blog” (shortname “blog”) channel with the following fields:
- (The default title field, named “Title”)
- Description: shortname “description”, type “textarea”
- Article: shortname “article”, type “rich text”
Create an “FAQ” channel with the following fields:
- (The default title field, named “Title”)
- Description: shortname “description”, type “textarea”
Create a “Landing Page” channel that only allows one entry with the following fields:
- (The default title field, named “Title”)
- Heading: shortname “heading”, type “text”
- Subheading: shortname “subheading”, type “text”
- Sections: shortname “sections”, type “grid”, with these grid fields:
- Channel ID: shortname “id”, type “text”
- Section Heading: shortname “heading”, type “text”
- Section Entry Limit: shortname “entry_limit”, type “text”
For each channel, add at least one entry.
Building a landing page
Now let’s create the templates. In ExpressionEngine, these templates are created in the user interface (although you can then edit them in the local filesystem). So, let’s navigate to the "Templates" section of the admin panel.
Templates and template groups
First, let’s create a new template group called web, which we'll set as the default. Template groups define the first segment of your URL, and the templates within them the second segment. So, the “team” template in the “about” template group would be visible at yoursite.com/about/team.
There’s one special extra consideration: the index template under your default template group defines what’s shown at your site’s root.
As soon as we create the web template group, we see an index template in this group; this is, effectively, the template for our site’s home page.
Let’s tweak this to turn it from a “Native EE” template to a Blade template. Click the cog for that line, under the “Manage” heading, and under “Engine” choose “Blade”. Save the settings, and this template is now rendered with Blade.
When selecting blade as a template engine, EE will generate a local file with an .html.blade extension. That means our new, blank index template will be created here: ee/system/user/templates/doodle/web.group/index.html.blade. Grab the Laravel index template here, paste it into our new index.html.blade file, and we'll modify it to work with EE.
Using ExpressionEngine tags inside Blade
To convert our existing template to be powered by ExpressionEngine, we’ll just want to work down our template bit by bit, replacing any content that should be dynamic with the appropriate calls to the dynamic variables and services EE exposes to us. Let’s walk through some of the most common sections:
<head> section: data that’s the same for the whole site
The static page, originally built for a Laravel app, had the following in the head tag:
<head> <html lang="{{ str_replace('_', '-', app()->getLocale()) }}"> <meta name="viewport" content="width=device-width, initial-scale=1"> <title>{{ config('app.name', 'Laravel') }}</title> <!-- Fonts --> <link rel="preconnect" href="https://fonts.bunny.net"> <link href="https://fonts.bunny.net/css?family=figtree:400,500,600&display=swap" rel="stylesheet" /> <!-- Scripts --> @vite(['resources/css/app.css', 'resources/js/app.js'])</head>The only way this needs to be different when it’s powered by EE is the <title> tag. ExpressionEngine injects a $global variable, which provides access to some of the site-wide configuration settings for your EE site. In this case, we can pull the site name off of it:
<title>{{ $global->site_name }}</title>Hero Section: one-off, page-specific data
Here’s our first section that will pull different content depending on the page we’re on. Remember, we created a channel of content specifically for the landing page, and this landing page hero is where we’re going to pull that in.
Here’s what our template looks like for this section:
Static HTML
<section id="hero"> <div class="px-4 pb-16 mx-auto mt-16 max-w-7xl sm:mt-24 sm:pb-24"> <div class="text-center"> <h1 class="text-4xl font-bold tracking-tight text-gray-900 sm:text-5xl md:text-6xl"> Capture your ideas with Doodle </h1> <p class="max-w-md mx-auto mt-3 text-base text-gray-500 sm:text-lg md:mt-5 md:max-w-3xl md:text-xl">Effortlessly take notes and stay on top of your tasks with out missing a beat.</p> </div> </div></section>We want to direct EE to give us the single Landing Page entry we created in the control panel, and pull its heading and subheading fields to fill out this content.
It’s time to learn about another new ExpressionEngine service: $exp. This is a powerful service that we can’t cover entirely here; for now, it’s sufficient to know that $exp is the main tool we’ll use to pull data out of channels.
$exp can be called using the following syntax:
{{ $exp->module_name->tag_name(['param1' => 'val1]) }}To pull data out of a channel entry, we can use the following syntax:
{{ $exp->channel->entries(['channel' => 'channel_name_here'])->first() }}It starts feeling pretty familiar once you see that entries() takes scoping parameters and can even take first(). If you haven't guessed it, yes, entries() returns an EloquentCollection... which should make a Laravel developer feel right at home!
So, let’s grab our data for the landing page, to be used later in the template:
@php $landingPage = $exp->channel->entries(['channel' => 'landing_page'])->first();@endphpAnd now, we can update the template:
<h1 class="text-4xl font-bold tracking-tight text-gray-900 sm:text-5xl md:text-6xl"> {{ $landingPage->heading }}</h1><p class="max-w-md mx-auto mt-3 text-base text-gray-500 sm:text-lg md:mt-5 md:max-w-3xl md:text-xl"> {{ $landingPage->subheading }}</p>FAQ section: iterating over a collection of entries
One of the most common ways we’ll pull data out of ExpressionEngine is to iterate over all the items in a collection. Let’s try that here, with the FAQ section:
Static HTML
<section id="faq"> <div class="px-6 py-24 mx-auto divide-y max-w-7xl divide-gray-900/10 sm:py-32 lg:py-40 lg:px-8"> <dl class="mt-10 space-y-8 divide-y divide-gray-900/10"> <!-- Single item that should be looped --> <div class="pt-8 lg:grid lg:grid-cols-12 lg:gap-8"> <dt class="text-base font-semibold leading-7 text-gray-900 lg:col-span-5">FAQ item title</dt> <dd class="mt-4 lg:col-span-7 lg:mt-0"> <p class="text-base leading-7 text-gray-600">FAQ item description</p> </dd> </div> <!-- End of single item that should be looped --> <!-- more items... --> </dl> </div></section>Pulling this data will be almost the same as how we pulled the landing_page data, but this time we'll iterate over the entire collection:
<section id="faq"> <div class="px-6 py-24 mx-auto divide-y max-w-7xl divide-gray-900/10 sm:py-32 lg:py-40 lg:px-8"> <dl class="mt-10 space-y-8 divide-y divide-gray-900/10"> @foreach ($exp->channel->entries(['channel' => 'faq']) as $faq) <div class="pt-8 lg:grid lg:grid-cols-12 lg:gap-8"> <dt class="text-base font-semibold leading-7 text-gray-900 lg:col-span-5">{{ $faq->title }}</dt> <dd class="mt-4 lg:col-span-7 lg:mt-0"> <p class="text-base leading-7 text-gray-600">{{ $faq->description }}</p> </dd> </div> @endforeach </dl> </div></section>Pulling and iterating over data from EE channels is very similar to doing the same with Eloquent; the biggest difference is that the EE service calls live in the template.
Using template partials
Pages like this can start to feel clumsy when they’re full of repeated sections, all doing their own independent work. With EE, we can build the concept of template partials, to separate out reusable pieces of our templates.
Open up the admin panel to the “Templates” section, and choose “Template Partials”.
Let’s create a template partial for our FAQ section; partials live in ee/system/user/templates/doodle/_partials. We’ll title it "section_faq", grab the entire FAQ <section> from our landing page template, and paste it directly into that file.
Note: If you create this template partial using the admin panel, it will be created as a plain HTML file. You'll either need to change the extension to
.html.blade, or create the file manually in the/_partialsdirectory with that filename extension.
Now we can replace that <section> in our index file and with this:
@include('ee::_partials.section_faq')Like many other aspects of working with EE, this is a pattern you could do in Laravel directly on the filesystem, but doing it through EE allows less-technical editors to more easily work with small portions of the HTML of the page.
Bonus: Dynamic sections and headings
One powerful tool ExpressionEngine offers is the ability for users to perform site management within the EE control panel. Here’s an example: let’s say we were to add a “blog” section just after the FAQ. We already have the channel for it, and we have the FAQ section to use as an example. Here’s what our index template would look like after that:
@include('ee::_partials.section_faq')@include('ee::_partials.section_blog')But what if we want the admin users to be able to define the order of these sections on the page, and what if we want to allow them to dynamically set headings for those sections, and even limit their number of entries?
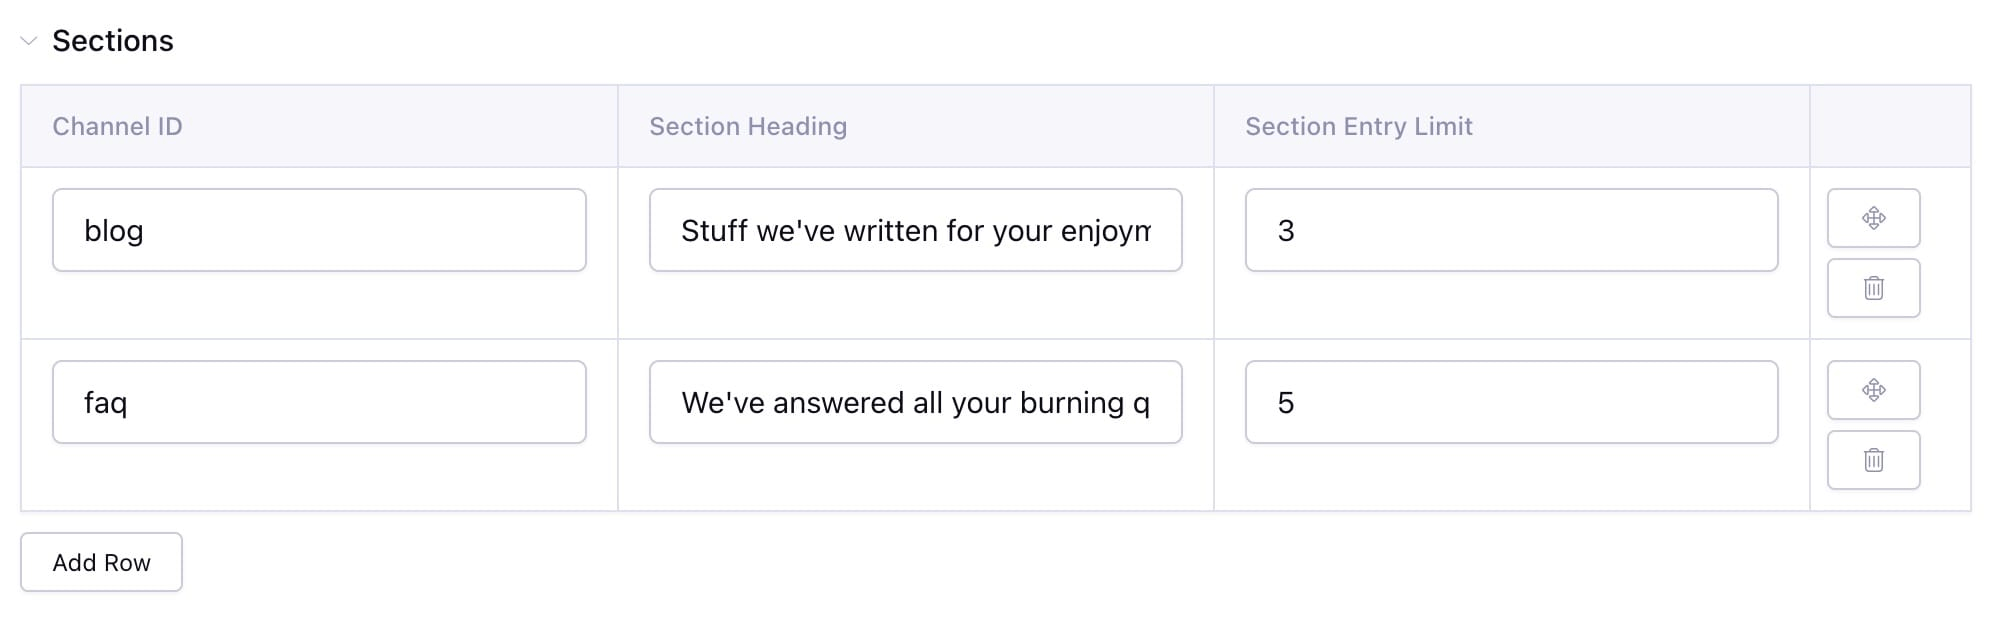
Thankfully, we’ve already created a field in our landing page channel that allows us to define the “sections” of our home page; each will contain the title of that section, its maximum number of entries, and the “ID” that matches it with a section template. We can add rows to the grid for blog and faq (and any other sections we add down the road). Here’s what it’ll look like in the admin panel:
Now, instead of manually including the templates, we’ll iterate through the entries in this grid and load the partials for each in order, passing in its heading and limit values:
@foreach ($landingPage->sections as $section) @include('ee::_partials.section_' . $section->id, [ 'heading' => $section->heading, 'limit' => $section->entry_limit, ])@endforeachWe can then update our template partials to use these new, passed-in variables. Take the FAQ template as an example:
Before
<section id="faq"> <div class="px-6 py-24 mx-auto divide-y max-w-7xl divide-gray-900/10 sm:py-32 lg:py-40 lg:px-8"> <dl class="mt-10 space-y-8 divide-y divide-gray-900/10"> @foreach ($exp->channel->entries(['channel' => 'faq']) as $faq) <div class="pt-8 lg:grid lg:grid-cols-12 lg:gap-8"> <dt class="text-base font-semibold leading-7 text-gray-900 lg:col-span-5">{{ $faq->title }}</dt> <dd class="mt-4 lg:col-span-7 lg:mt-0"> <p class="text-base leading-7 text-gray-600">{{ $faq->description }}</p> </dd> </div> @endforeach </dl> </div></section>After
<section id="faq"> <div class="px-6 py-24 mx-auto divide-y max-w-7xl divide-gray-900/10 sm:py-32 lg:py-40 lg:px-8"> <div class="max-w-3xl mx-auto text-center"> <h2 class="text-lg font-semibold leading-8 tracking-tight text-amber-600">{{ $heading }}</h2> </div> <dl class="mt-10 space-y-8 divide-y divide-gray-900/10"> @foreach ($exp->channel->entries(['channel' => 'faq', 'limit' => $limit]) as $faq) <div class="pt-8 lg:grid lg:grid-cols-12 lg:gap-8"> <dt class="text-base font-semibold leading-7 text-gray-900 lg:col-span-5">{{ $faq->title }}</dt> <dd class="mt-4 lg:col-span-7 lg:mt-0"> <p class="text-base leading-7 text-gray-600">{{ $faq->description }}</p> </dd> </div> @endforeach </dl> </div></section>The end... for now
ExpressionEngine is a powerful tool, and we’ve only scratched the surface here—not just of ExpressionEngine, but of all the possibilities that Coilpack opens up for your Laravel and ExpresseionEngine app. Stay tuned for our future posts sharing all the best details of how the combination of ExpressionEngine and Coilpack can power up a robust content management workflow for your Laravel apps.
©2023 Tighten Co.