

For the longest time, sites running on ExpressionEngine have had only one option for templating and hosting: EE's native templating engine, hosted on a server that runs the entire EE instance. This is a powerful setup, but what if you want to create a more modular setup, using ExpressionEngine as a headless CMS? What if you want a static-generated site, or to host your site on serverless, or to hook your backend into multiple different frontends with GraphQL?
With ExpressionEngine's new tool Coilpack, all of these are possible. Let's imagine we have an existing ExpressionEngine site that we want to make headless; in this tutorial we'll walk through how to enable Coilpack's GraphQL settings and use our existing site's data to power a Next.js-based site, communicating via GraphQL, and hosted on Vercel.
An overview
Here's a quick overview of what this process is going to look like.
Coilpack: First, we'll make sure our EE site is attached to a Laravel app (which will now become a part of our EE site) through Coilpack. Then, we'll enable GraphQL in Coilpack, exposing our EE site's data to our upcoming Next.js app.
Next.js: Next, we'll build a Next.js app and code it to pull data from our EE backend via GraphQL.
Vercel: Finally, we'll deploy the entire site to Vercel, the serverless hosting platform for Next.js.
Table of Contents
- Connect EE site to Coilpack
- Enable GraphQL in our Laravel + EE app
- Create Next.js App
- Build Landing Page
- Building GraphQL Query
- Connect Next.JS to GraphQL
- Deploy to Vercel
Connect EE site to Coilpack
The rest of the steps in this article require our ExpressionEngine site to be integrated with a Laravel app using Coilpack.
Not gotten that far yet? Don't worry, we've got a quick tutorial on how to connect your existing ExpressionEngine app to Coilpack.
Enable GraphQL in our Laravel + EE app
Coilpack's GraphQL support is disabled by default. To enable it, you'll want to edit a file Laravel apps use for local configuration: .env.
By default,
.envis ignored by Git, so if you don't have a.envfile, copy the.env.examplefile and rename the copy to.envand make these changes there. Note that you'll have to do this same process every time you clone or deploy this Laravel app to a new computer or server.
Once you have .env open, scroll to the bottom and add this line:
COILPACK_GRAPHQL_ENABLED=trueNow GraphQL is enabled in your site and you're ready to start building.
To make the beginning of this tutorial simpler, we're also going to temporarily disable GraphQL's authentication requirements. Underneath the line you just added, add a second line:
COILPACK_GRAPHQL_AUTH_ENABLED=falseThis is not something you want to set up on a production app; we're just using it this way for our tutorial.
With those two environment variables added, we can visit the EE/Laravel site in our browser and try the /graphql endpoint. If you followed our last tutorial, and you're running Valet, your site will be at http://doodle.test/, so your GraphQL endpoint will be http://doodle.test/graphql.
If you visit the GraphQL endpoint in your browser, you should see an error telling you which parameters you're missing; don't worry, this is perfect! This shows us the GraphQL integration is enabled successfully.
{"errors":[{"message":"GraphQL Request must include at least one of those two parameters: \"query\" or \"queryId\"","extensions":{"category":"request"},"trace": …If you visit the GraphQL endpoint and receive a 404, your .env configuration items may have been mistyped. Also, if you cache your config (which you shouldn't do locally), you will need to run php artisan config:clear to re-load your .env config into the app.
Create Next.js App
Next.js is an extremely popular React-based framework, created by Vercel. It's as powerful as many full-stack frameworks, but at its core it's a frontend framework for deploying fast, light, hyper-optimized web experiences. If you deploy it to Vercel (a serverless hosting service), you'll find it's even faster, as the Vercel team has explicitly optimized both the hosting and the framework for speed when used together.
By following the Next.js docs we can quickly create a new Next.js app. The docs recommend using the create-next-app command line utility, which automatically sets up the project. Please note that, unlike how our Laravel/Coilpack installations are in the same folder and repository as our ExpressionEngine app, our Next.js app will need to be in a separate folder and separate Git repository.
cd ~/Sitesnpx create-next-app@latestIf npx doesn't exist on your system, we'd recommend using nvm to install NPM and Node on your machine. Npx comes with them for free.
Running this command will prompt you to install the create-next-app utility if you don't have it already installed. Once it's installed, it'll run, and ask you a series of questions about the Next.js app you're building.
Selecting the defaults for all of these prompts will work well for the purposes of this tutorial.
What is your project named? … next-doodle✔ Would you like to use TypeScript with this project? … [No] / Yes✔ Would you like to use ESLint with this project? … No / [Yes]✔ Would you like to use Tailwind CSS with this project? … No / [Yes]✔ Would you like to use `src/` directory with this project? … No / [Yes]✔ Would you like to use experimental `app/` directory with this project? … [No] / Yes✔ What import alias would you like configured? … @/*Creating a new Next.js app in ~/Sites/next-doodle.Now we change into that directory and run the app:
cd next-doodlenpm run devRunning npm run dev spins up a local development server, and we can view our next.js app in the browser at http://localhost:3000/.
http://localhost:3000/
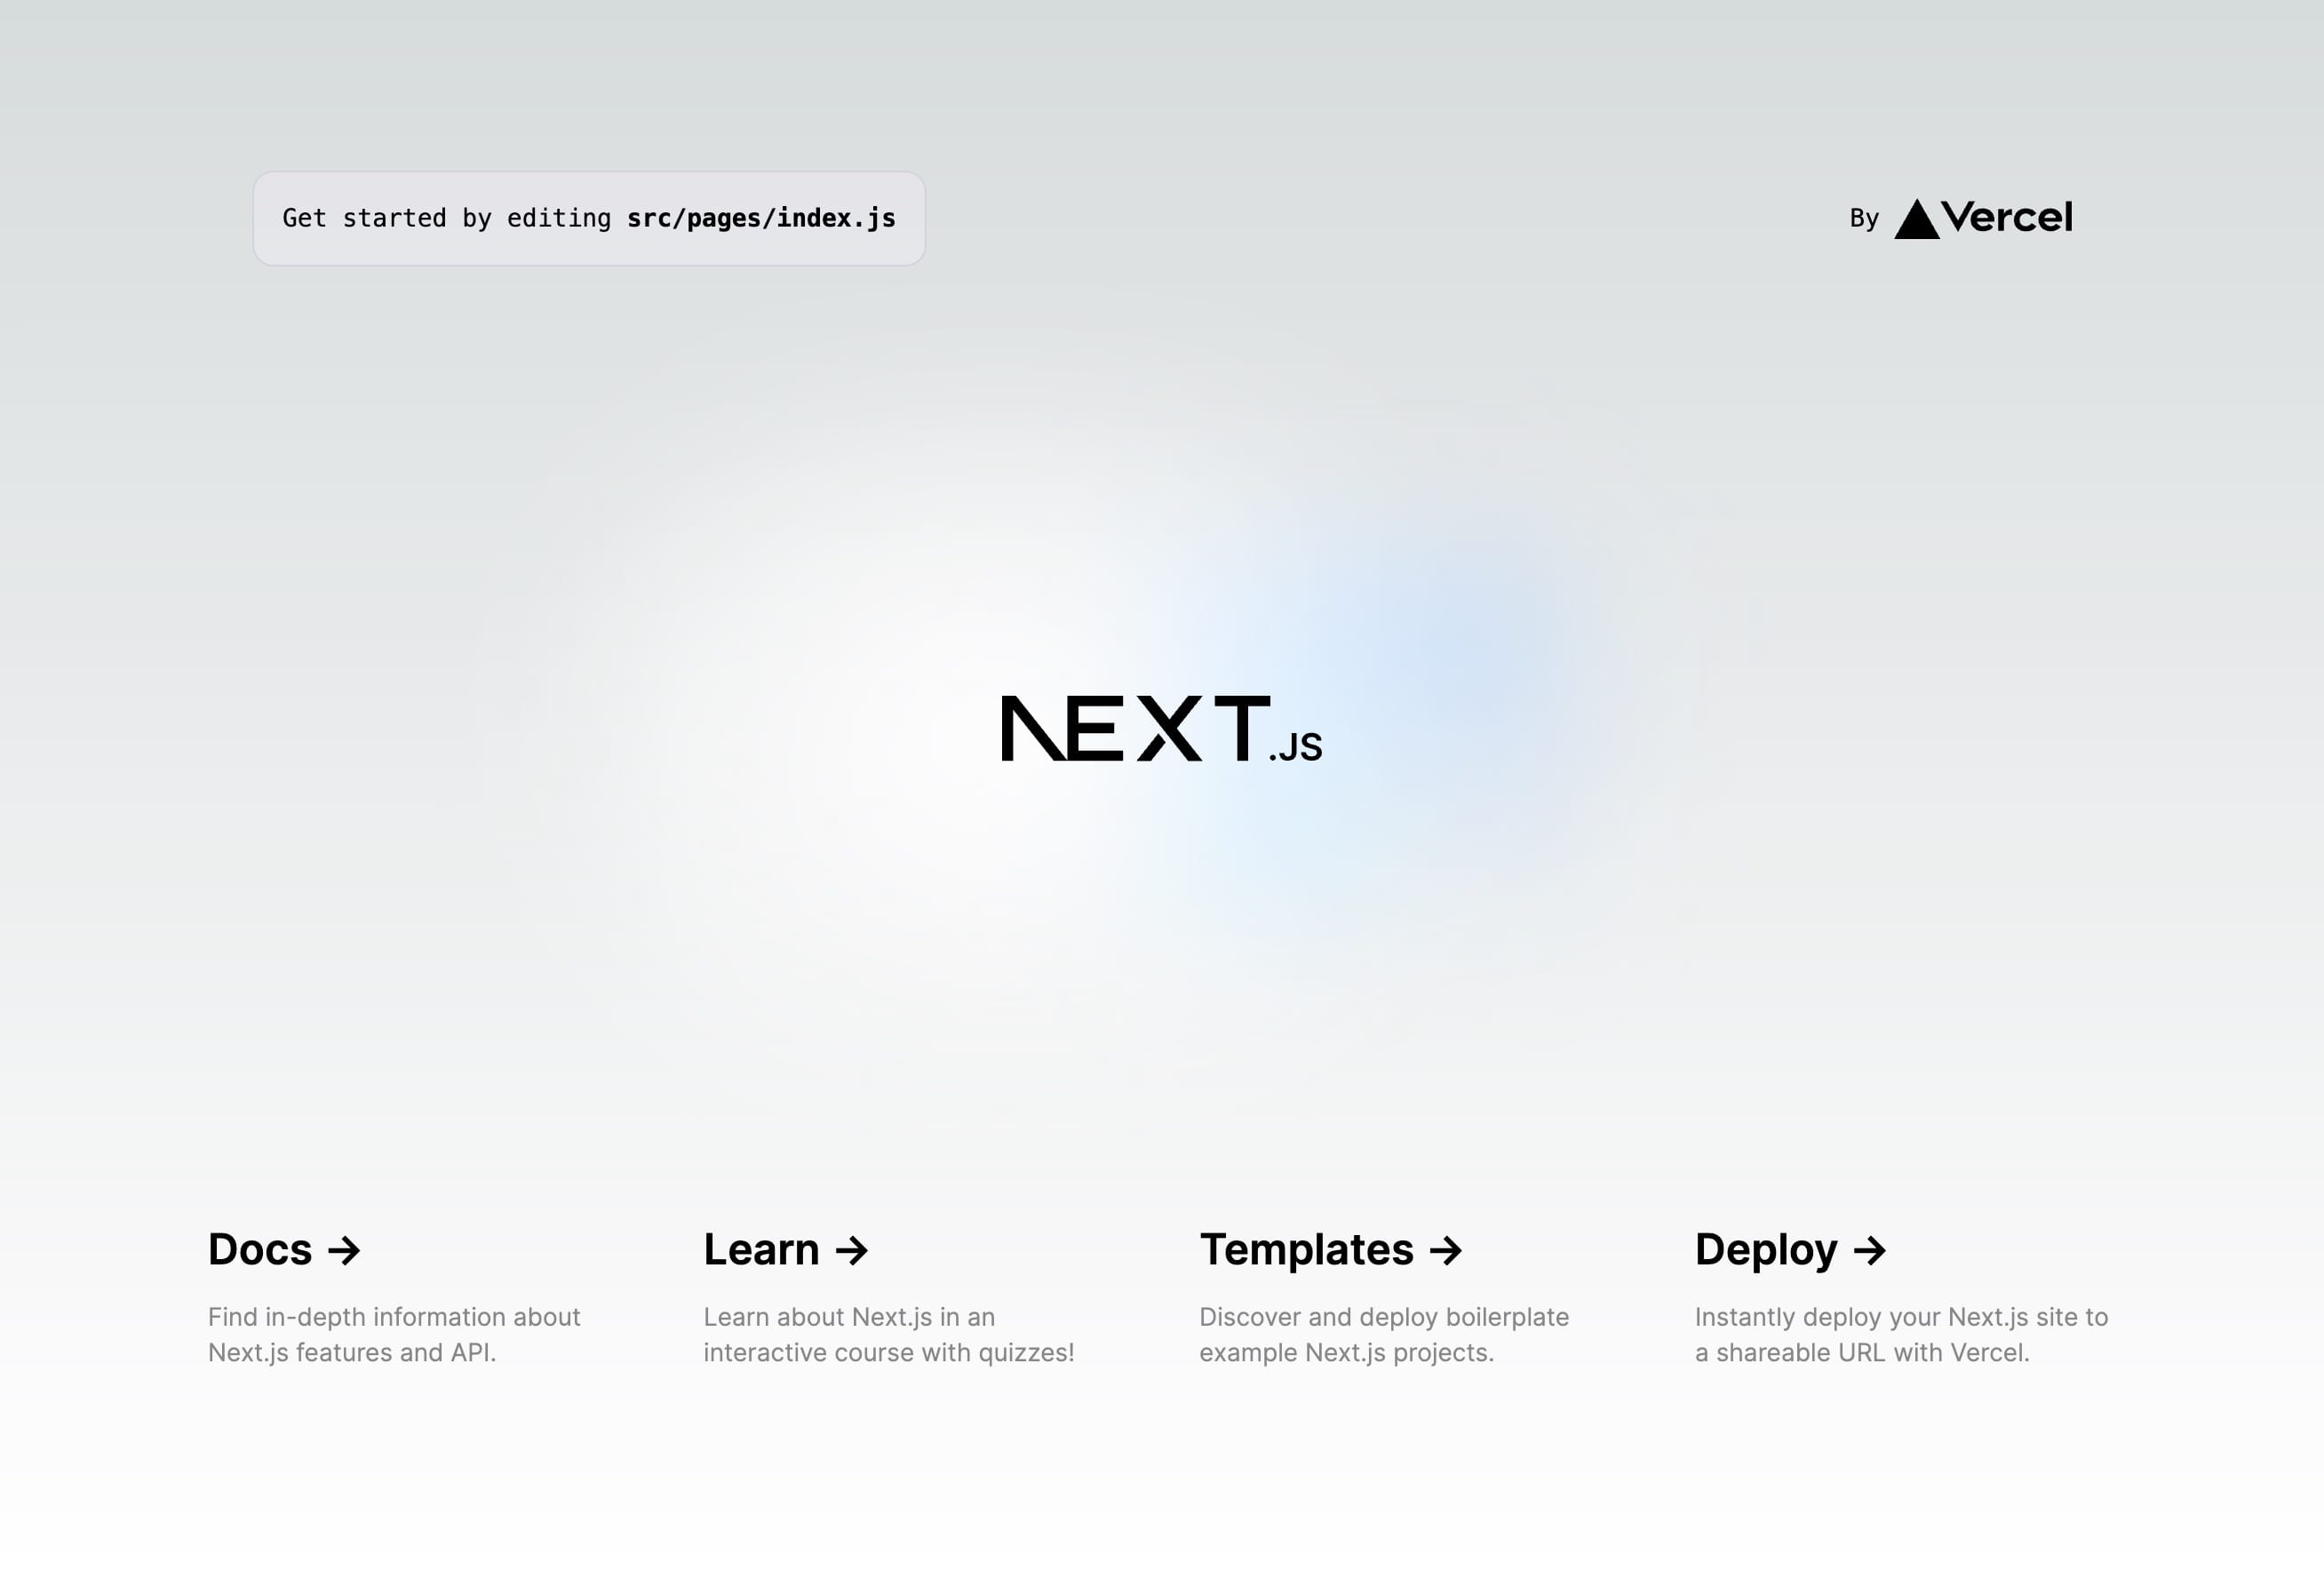
Make any small change to your /src/pages/index.js file, and you'll see it'll automatically refresh the site in your browser with the changes.
Build Landing Page
Like our first tutorial, we'll be building a sample page for an app called "Doodle", which will have channels for the blog, an FAQ, and the landing page. You can, of course, use your own EE site's channels here as you follow along.
Before we get started building out our own content, let's strip out the default styles Next.js ships with.
First, the JavaScript; let's strip out the content of src/pages/index.js so we just end up with this:
export default function Home() { return ( <main> {/* Content will be here */} </main> )}Next, the CSS: let's remove any custom styles from the src/styles/globals.css file, leaving only the Tailwind CSS imports:
@tailwind base;@tailwind components;@tailwind utilities;Finally, we can also remove any extras in our tailwind.config.js file, resetting it to the Tailwind defaults:
/** @type {import('tailwindcss').Config} */ module.exports = { content: [ './src/pages/**/*.{js,ts,jsx,tsx}', './src/components/**/*.{js,ts,jsx,tsx}', './src/app/**/*.{js,ts,jsx,tsx}', ], theme: { extend: {- backgroundImage: { - 'gradient-radial': 'radial-gradient(var(--tw-gradient-stops))', - 'gradient-conic': - 'conic-gradient(from 180deg at 50% 50%, var(--tw-gradient-stops))', - }, }, }, plugins: [], }Now, it's time to put our own markup into the page! For the sake of this tutorial, we'll create the Doodle home page with a Hero section, a Blog section, and an FAQ.
Let's create individual files for each, under the src/components directory. Next.js uses jsx files for templates:
src/components/Hero.jsx
export function Hero() { return ( <section id="hero"> <div className="mx-auto mt-16 max-w-7xl px-4 sm:mt-24 pb-16 sm:pb-24"> <div className="text-center"> <h1 className="text-4xl font-bold tracking-tight text-gray-900 sm:text-5xl md:text-6xl"> <span className="block xl:inline">Capture your ideas with Doodle</span> </h1> <p className="mx-auto mt-3 max-w-md text-base text-gray-500 sm:text-lg md:mt-5 md:max-w-3xl md:text-xl">Effortlessly take notes and stay on top of your tasks with out missing a beat.</p> </div> </div> </section> )}src/components/Blog.jsx
export function Blog() { return ( <section id="blog" className="relative bg-gray-50 px-6 pt-16 pb-20 lg:px-8 lg:pt-24 lg:pb-28"> <div className="absolute inset-0"> <div className="h-1/3 bg-white sm:h-2/3"></div> </div> <div className="relative mx-auto max-w-7xl"> <div className="text-center"> <h2 className="text-3xl font-bold tracking-tight text-gray-900 sm:text-4xl">From the blog</h2> <p className="mx-auto mt-3 max-w-2xl text-xl text-gray-500 sm:mt-4">Lorem ipsum dolor sit amet consectetur, adipisicing elit. Ipsa libero labore natus atque, ducimus sed.</p> </div> <div className="mx-auto mt-12 grid max-w-lg gap-5 lg:max-w-none lg:grid-cols-3"> <div className="flex flex-col overflow-hidden rounded-lg shadow-lg"> <div className="flex-shrink-0"> <img className="h-48 w-full object-cover" src="https://images.unsplash.com/photo-1496128858413-b36217c2ce36?ixlib=rb-1.2.1&ixid=eyJhcHBfaWQiOjEyMDd9&auto=format&fit=crop&w=1679&q=80" alt="" /> </div> <div className="flex flex-1 flex-col justify-between bg-white p-6"> <div className="flex-1"> <p className="text-sm font-medium text-amber-600"> <a href="#" className="hover:underline">Tips & Tricks</a> </p> <a href="#" className="mt-2 block"> <p className="text-xl font-semibold text-gray-900">10 Tips for Taking Better Notes and Boosting Your Productivity</p> <p className="mt-3 text-base line-clamp-4 text-gray-500">Are you tired of taking sloppy notes that you can't decipher later? Do you feel like you're always missing important details in meetings or lectures? Our note-taking app can help! In this blog post, we'll share our top 10 tips for taking better notes and staying organized, so you can boost your productivity and achieve your goals.</p> </a> </div> <div className="mt-6 flex items-center"> <div className="flex-shrink-0"> <a href="#"> <span className="sr-only">Roel Aufderehar</span> <img className="h-10 w-10 rounded-full" src="https://images.unsplash.com/photo-1472099645785-5658abf4ff4e?ixlib=rb-1.2.1&ixid=eyJhcHBfaWQiOjEyMDd9&auto=format&fit=facearea&facepad=2&w=256&h=256&q=80" alt="" /> </a> </div> <div className="ml-3"> <p className="text-sm font-medium text-gray-900"> <a href="#" className="hover:underline">Roel Aufderehar</a> </p> <div className="flex space-x-1 text-sm text-gray-500"> <time datetime="2020-03-16">Mar 16, 2020</time> <span aria-hidden="true">·</span> <span>6 min read</span> </div> </div> </div> </div> </div> </div> </div> </section> )}src/components/Faq.jsx
export function Faq() { return ( <section id="faq"> <div className="mx-auto max-w-7xl divide-y divide-gray-900/10 px-6 py-24 sm:py-32 lg:py-40 lg:px-8"> <div className="mx-auto max-w-3xl text-center"> <h2 className="text-lg font-semibold leading-8 tracking-tight text-amber-600">Frequently Asked Questions</h2> <p className="mt-2 text-3xl font-bold tracking-tight text-gray-900 sm:text-4xl">We've answered all your burning questions. Hopefully.</p> </div> <dl className="mt-10 space-y-8 divide-y divide-gray-900/10"> <div className="pt-8 lg:grid lg:grid-cols-12 lg:gap-8"> <dt className="text-base font-semibold leading-7 text-gray-900 lg:col-span-5">Is this a real app?</dt> <dd className="mt-4 lg:col-span-7 lg:mt-0"> <p className="text-base leading-7 text-gray-600">No this is a example Laravel application built by the lovely folks at Tighten to showcase various implementations of CoilPack for Expression Engine.</p> </dd> </div> </dl> </div> </section> )}Let's throw includes into the home page (src/pages/index.js) to bring each of those components in:
import { Blog } from "@/components/Blog";import { Faq } from "@/components/Faq";import { Hero } from "@/components/Hero"; export default function Home() { return ( <main> <Hero /> <Blog /> <Faq /> </main> )}At this point you should see something similar to the screenshot below in your browser.
http://localhost:3000/

Now that we have a Next.js app working, with our correct sections laid out waiting for real data, let's get into how we can build GraphQL queries and teach our app how to make those queries.
Building our GraphQL Query
GraphQL is one of those concepts you may have heard of—often talking about GraphQL as the latest and greatest language for APIs—but there's a very good chance you've never actually had the chance to work with it yourself.
Here's what GraphQL is in general: it's both a language for querying APIs, and it's also the system ("runtime") for fulfilling those queries with your existing data.
Unlike many traditional APIs, especially those based on SOAP and REST, GraphQL APIs allow us to describe in one query all the data we need for a large and complex page. It does mean that there's a learning curve to creating these queries, but once you have them figured out, they're immensely powerful—and fast.
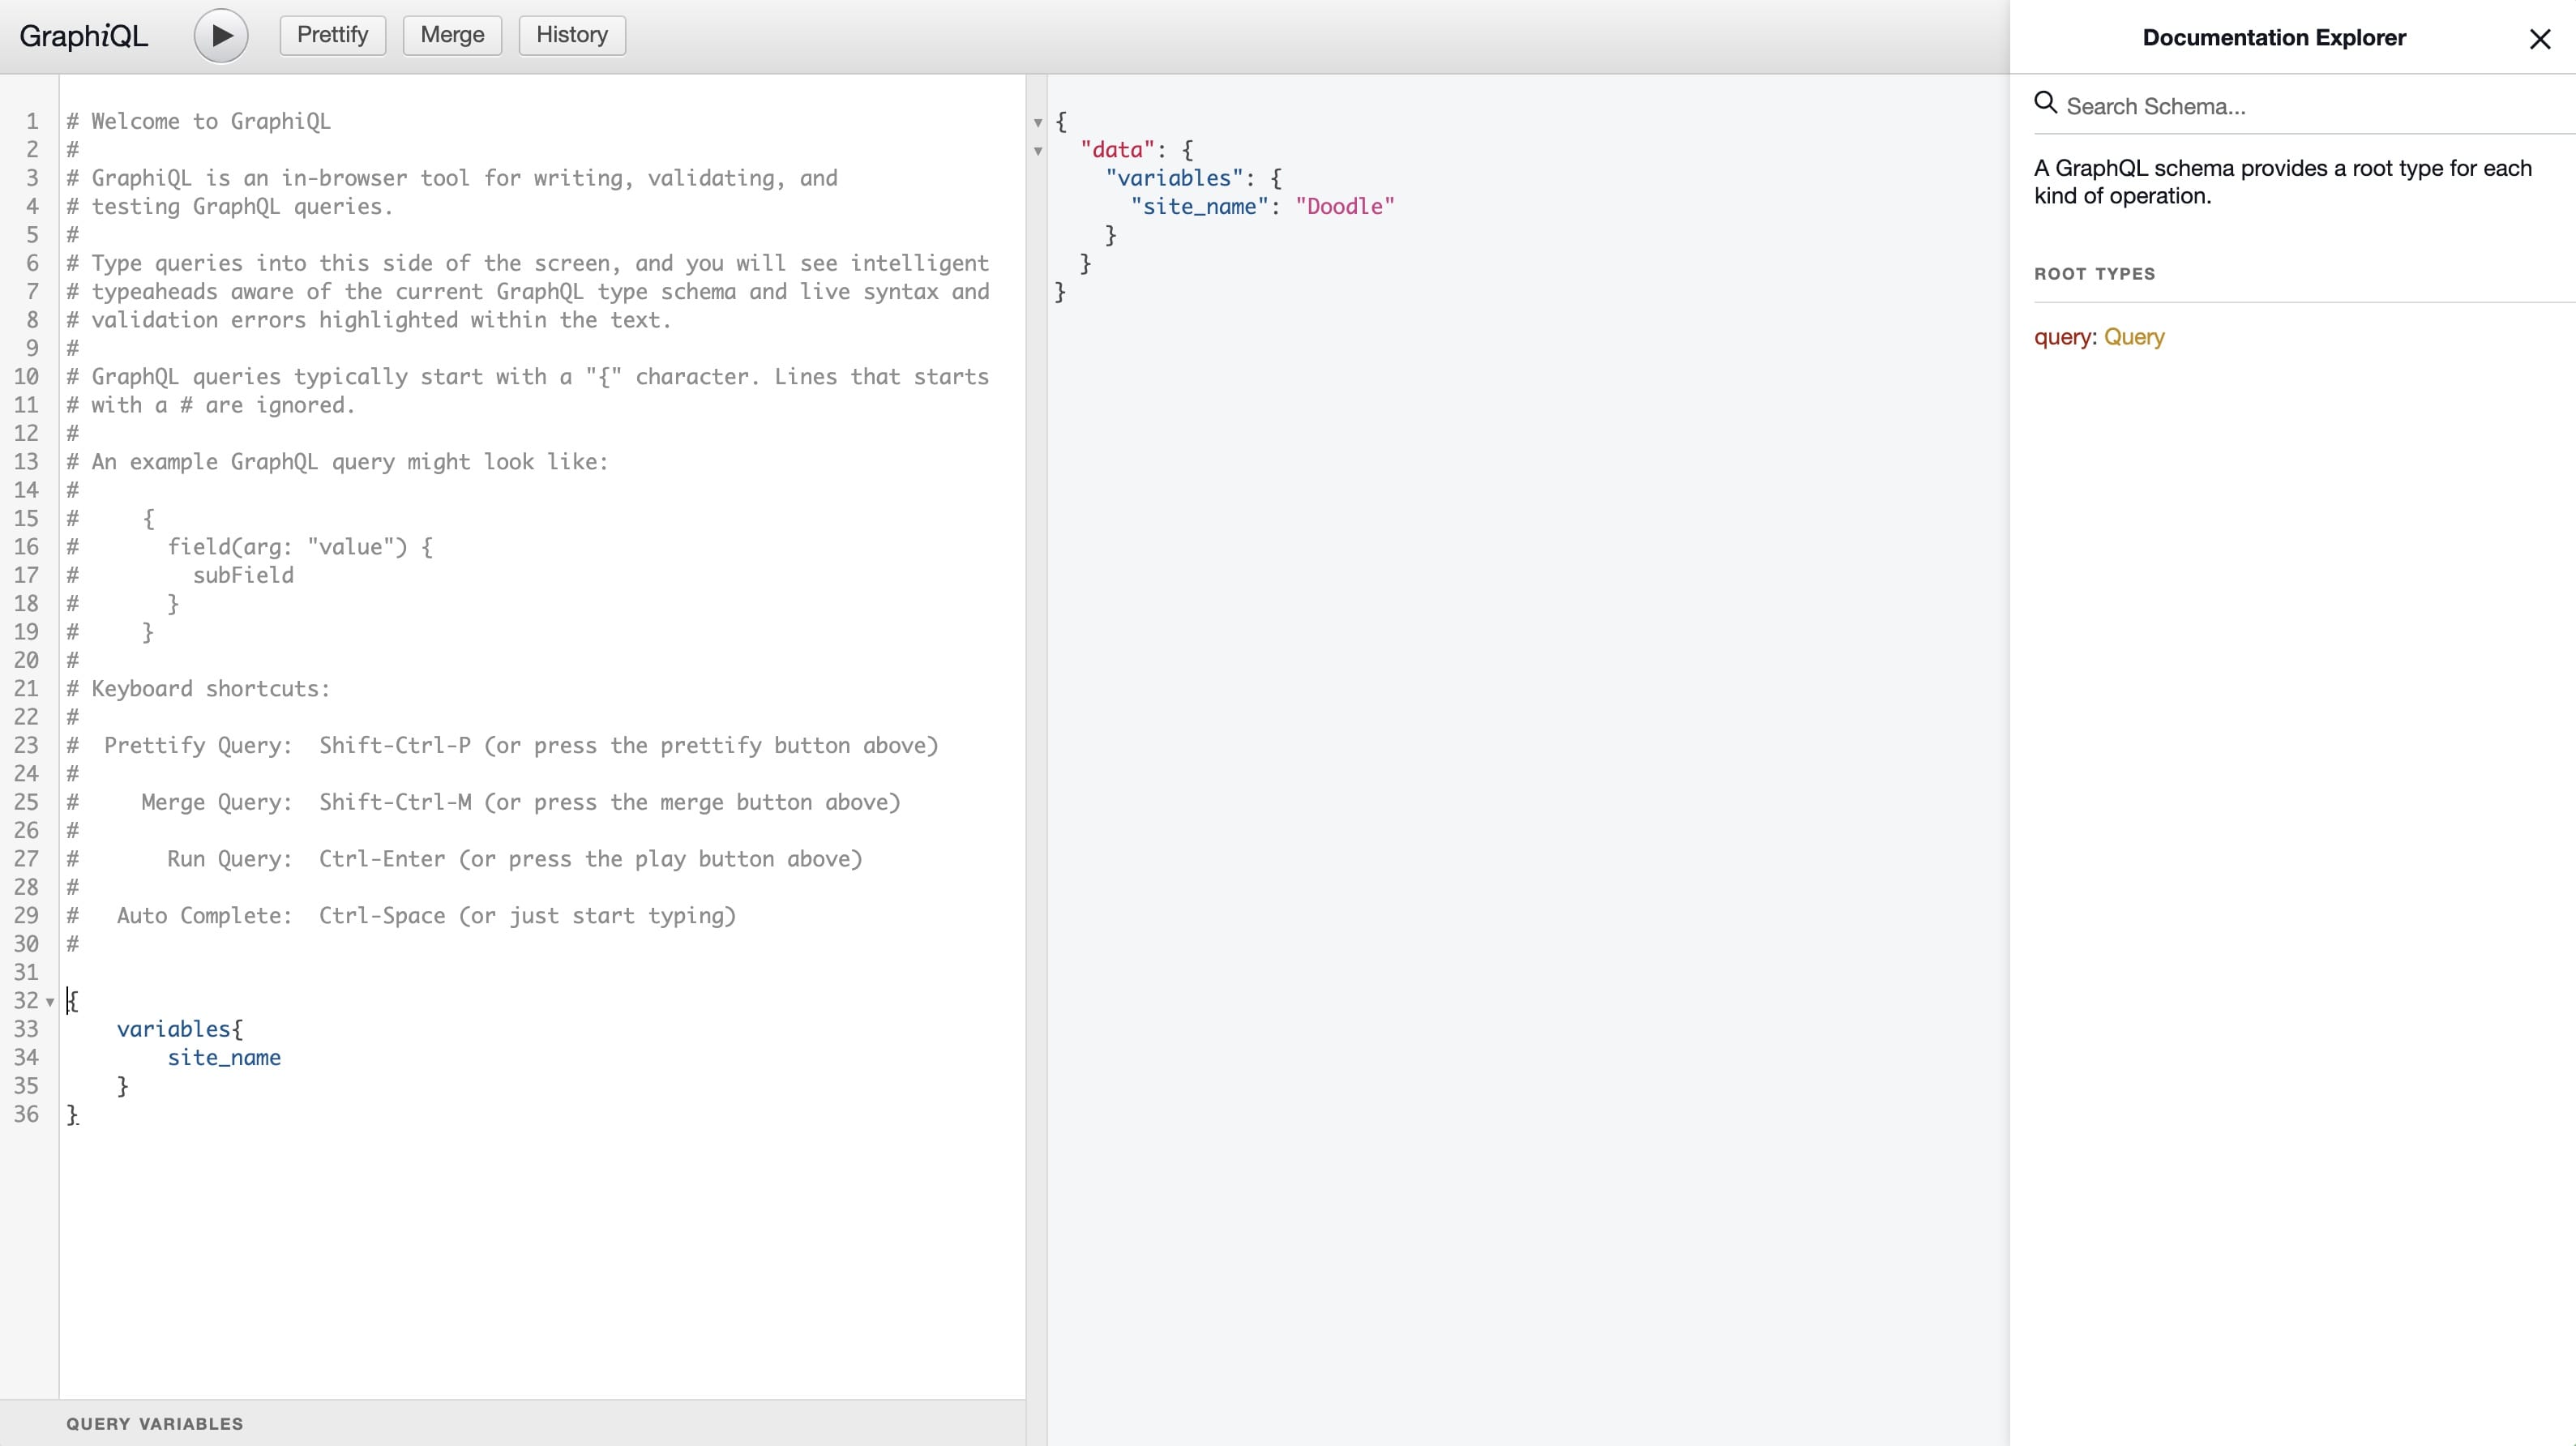
Thankfully, Coilpack comes with a tool called GraphiQL, an IDE (integrated development environment) that helps us write our own custom GraphQL queries.
http://doodle.test/graphiql
To enable the GraphiQL IDE, open up that same .env file we've already modified, and add another new line:
COILPACK_GRAPHIQL_ENABLED=trueThis will enable the GraphiQL helper, which we'll jump into to create our GraphQL query to populate our Next.js app with data from our headless ExpressionEngine.
We need to get the following data from our Expression Engine site:
- Site name
- One Landing page entry
- Three Blog posts
- All FAQ entries
Using the GraphIQL interface is fairly straightforward. When you first open it in your browser, you'll see a few lines of comments explaining how to use the interface, as well as some handy keyboard shortcuts to make working within it much faster. However, there are no explicit instructions on what the buttons do; here's a quick run-down of what each of the buttons can be used for:
- Play: runs the query and displays the results in the right hand column
- Prettify: formats the text in the editor by adding spaces and tabs so the query is clean; also removes comments
- Merge: combines a query with defined fragments into one; a great example can be found on StackOverflow
- History: Opens a panel to the left of the editor displaying the previous times the "Play" button has been clicked
To retrieve the site's name we can use the Global Variables query, which would look like:
{ variables { site_name }}Copy the above query, paste it into the editor in /graphiql, then press the play button; you can now see the result of this query:
{ "data": { "variables": { "site_name": "Doodle" } }}Getting just the site name back isn't the most exciting thing we've done so far. But it does show us that our Laravel + EE app is properly configured and can send us back data.
Let's get more exciting content by moving on to the Channel Entries query, which, if you're an EE developer, will seem very familiar to the Channel Entries Tag.
In our ExpressionEngine install, as you can remember from our last tutorial, we have a "Landing Page" channel that has one entry. We can use the exp_channel_entries query to specify the channel we want data from and what data exactly from that channel we want returned.
{ exp_channel_entries(channel: "landing_page") { data { entry_id title heading subheading } }}Unlike grabbing data out of the database, there is no
SELECT *in GraphQL; we have to be explicit about what we properties we want returned.
We also have a grid field on the "landing page" called sections. However, if we try to add that to the data key in this query, we'll get an error. That's because sections is an object, which means we need to specify the fields underneath it:
{ exp_channel_entries(channel: "landing_page") { data { entry_id title heading subheading sections { id heading } } }}Now, let's create another query that will grab our three blog posts. We'll use the limit option on the exp_channel_entries query, in addition to the channel option we were already using.
{ exp_channel_entries( channel: "blog" limit: 3 ) { data { entry_id title description } }}Each entry in our blog channel also has an author and categories, and we'd like all of those as well. So, let's update our query to add those and their required properties:
{ exp_channel_entries( channel: "blog" limit: 3 ) { data { entry_id title description categories { cat_name } author { screen_name } } }}And here's what we'll get back from that query:
{ "data": { "exp_channel_entries": { "data": [ { "entry_id": 1, "title": "10 Tips for Taking Better Notes and Boosting Your Productivity", "description": "Are you tired of taking sloppy notes that you can't decipher later? Do you feel like you're always missing important details in meetings or lectures? Our note-taking app can help! In this blog post, we'll share our top 10 tips for taking better notes and staying organized, so you can boost your productivity and achieve your goals.", "categories": [ { "cat_name": "Tips & Tricks" } ], "author": { "screen_name": "Andy Newhouse" } }, ] } }}Here's something interesting about this query: categories returns an array of objects, one for each category, but author returns a single object back with a single field. That's because Coilpack is smart enough to know that we've defined (in EE) that there can be more than one category, but only one author.
Now that we've built two individual queries, let's gather them together into a single query. As you can see, we've combined all the queries together in one, with each prefaced by an "alias" name for that query:
{ landing_page: exp_channel_entries( channel: "landing_page" ) { data { entry_id title ... } } blog: exp_channel_entries( channel: "blog" ) { data { entry_id title ... } }}Since we are using aliases, the result will have the data keyed by the alias instead of exp_channel_entries:
{ "data": { "landing_page": { "data": [ { "entry_id": 4, "title": "home" } ] }, "blog": { "data": [ { "entry_id": 1, "title": "10 Tips for Taking Better Notes and Boosting Your Productivity" }, ... ] } }}Putting together all we've learned and all the data we need to populate the landing page, our final query looks like this:
{ landing_page: exp_channel_entries(channel: "landing_page") { data { entry_id title heading subheading sections { id heading } } } blog: exp_channel_entries(channel: "blog", limit: 3) { data { entry_id title description entry_date categories { cat_name } author { screen_name } } } faq: exp_channel_entries(channel: "faq") { data { entry_id title description } }}Connect Next.JS to GraphQL
We've built our Next.js template and our GraphQL query to fill it with real data from our ExpressionEngine site. Now, let's get them connected together.
Let's start by adding a GraphQL class to the Next.JS app; we'll build that in src/graphql.js:
class GraphQL { static endpoint = 'http://doodle.test/graphql'; static async query(query) { const headers = { 'Content-Type': 'application/json' }; const response = await fetch(this.endpoint, { method: 'POST', headers, body: JSON.stringify({ query }), }); const json = await response.json(); if (json.errors) { console.log(json.errors); throw new Error('GraphQL query failed.'); } return json.data; }} export default GraphQL;To pass data to the Home component we will use its getStaticProps() method. Anything returned from this function in the props object can be deconstructed as parameters to our Home page function.
Inside this function we will use the GraphqQL.query() method and pass it the query we came up with in the last section. Then we will return variables from the data returned.
import { Blog } from "@/components/Blog";import { Faq } from "@/components/Faq";import { Features } from "@/components/Features";import { Hero } from "@/components/Hero";import { Testimonials } from "@/components/Testimonials";import GraphQL from "@/graphql"; export async function getStaticProps() { const data = await GraphQL.query(` { landing_page: exp_channel_entries(
channel: "landing_page" ) { data { entry_id title heading subheading sections { id heading, } } } blog: exp_channel_entries( channel: "blog" limit: 3 ) { data { entry_id title description entry_date categories { cat_name } author { screen_name } } } faq: exp_channel_entries( channel: "faq" ) { data { entry_id title description } } } `); return { props: { entry: data.landing_page.data[0], // since there's only one, lets only return the first one posts: data.blog.data, faq: data.faq.data, }, };} export default function Home({ entry, testimonials, faq }) { return ( <main> <Hero /> <Blog /> <Faq /> </main> )}Now let's pass the data to their respective components:
...export default function Home({ entry, features, posts, testimonials, faq }) { return ( <main> <Hero heading={entry.heading} subheading={entry.subheading} /> <Blog posts={posts} /> <Faq faq={faq} /> </main> )}Next, we'll update the various components to use the data we just passed to them.
src/components/Hero.jsx
export function Hero({ heading, subheading }) { return ( <section id="hero"> <div className="mx-auto mt-16 max-w-7xl px-4 sm:mt-24 pb-16 sm:pb-24"> <div className="text-center"> <h1 className="text-4xl font-bold tracking-tight text-gray-900 sm:text-5xl md:text-6xl"> <span className="block xl:inline">{heading}</span> </h1> <p className="mx-auto mt-3 max-w-md text-base text-gray-500 sm:text-lg md:mt-5 md:max-w-3xl md:text-xl">{subheading}</p> </div> </div> </section> ) }For the remaining components we will use a common React pattern of mapping over an array and rendering the template defined in the function.
src/components/Faq.jsx
export function Faq({ faq }) { return ( <section id="faq"> <div className="mx-auto max-w-7xl divide-y divide-gray-900/10 px-6 py-24 sm:py-32 lg:py-40 lg:px-8"> <div className="mx-auto max-w-3xl text-center"> <h2 className="text-lg font-semibold leading-8 tracking-tight text-amber-600">Frequently Asked Questions</h2> <p className="mt-2 text-3xl font-bold tracking-tight text-gray-900 sm:text-4xl">We've answered all your burning questions. Hopefully.</p> </div> <dl className="mt-10 space-y-8 divide-y divide-gray-900/10"> {faq.map(entry => ( <div key={entry.entry_id} className="pt-8 lg:grid lg:grid-cols-12 lg:gap-8"> <dt className="text-base font-semibold leading-7 text-gray-900 lg:col-span-5">{entry.title}</dt> <dd className="mt-4 lg:col-span-7 lg:mt-0"> <p className="text-base leading-7 text-gray-600">{entry.description}</p> </dd> </div> ))} </dl> </div> </section> )}If you're interested in the diffs of the blog component and how is was modified, check out the following commit from this project:
We now have a Next.js landing page that's rendered using data retrieved from our ExpressionEngine install using GraphQL. 🎉
Deploy to Vercel
All that remains is pushing this site to Vercel! And we're almost there.
Before we do, however, we need to update our GraphQL.js file to use an environment variable for the endpoint URL instead of a hardcoded URL; we also need to secure the /graphql endpoint again. Similar to Laravel, Next.js has built-in support for loading environment variables from an environment file; for Next.js, it's loading from .env.local into process.env.
In our Laravel + EE app, let's generate an authentication token: run php artisan coilpack:graphql --generate-token. This should remove COILPACK_GRAPHQL_AUTH_ENABLED=false from the .env file and add COILPACK_GRAPHQL_TOKEN={token} with {token} being a real token string.
Copy the token that comes after COILPACK_GRAPHQL_TOKEN=. In our Next.JS app's local environment we can now create an .env.local file and add the following to it:
GRAPHQL_URL=http://doodle.testGRAPHQL_TOKEN=PASTE_TOKEN_FROM_LARAVEL_APP_HEREIn src/graphql.js, we can update the URL to use the environment variable and add the bearer token to the request headers so the query can be properly authenticated:
class GraphQL { - static endpoint = 'http://doodle.test/graphql'; + static endpoint = process.env.GRAPHQL_URL; static async query(query) { const headers = { 'Content-Type': 'application/json',+ 'Authorization': 'Bearer ' + process.env.GRAPHQL_TOKEN };This will work locally, and we can add the environment variables in Vercel when we deploy it there.
At long last, we are ready to deploy to Vercel!
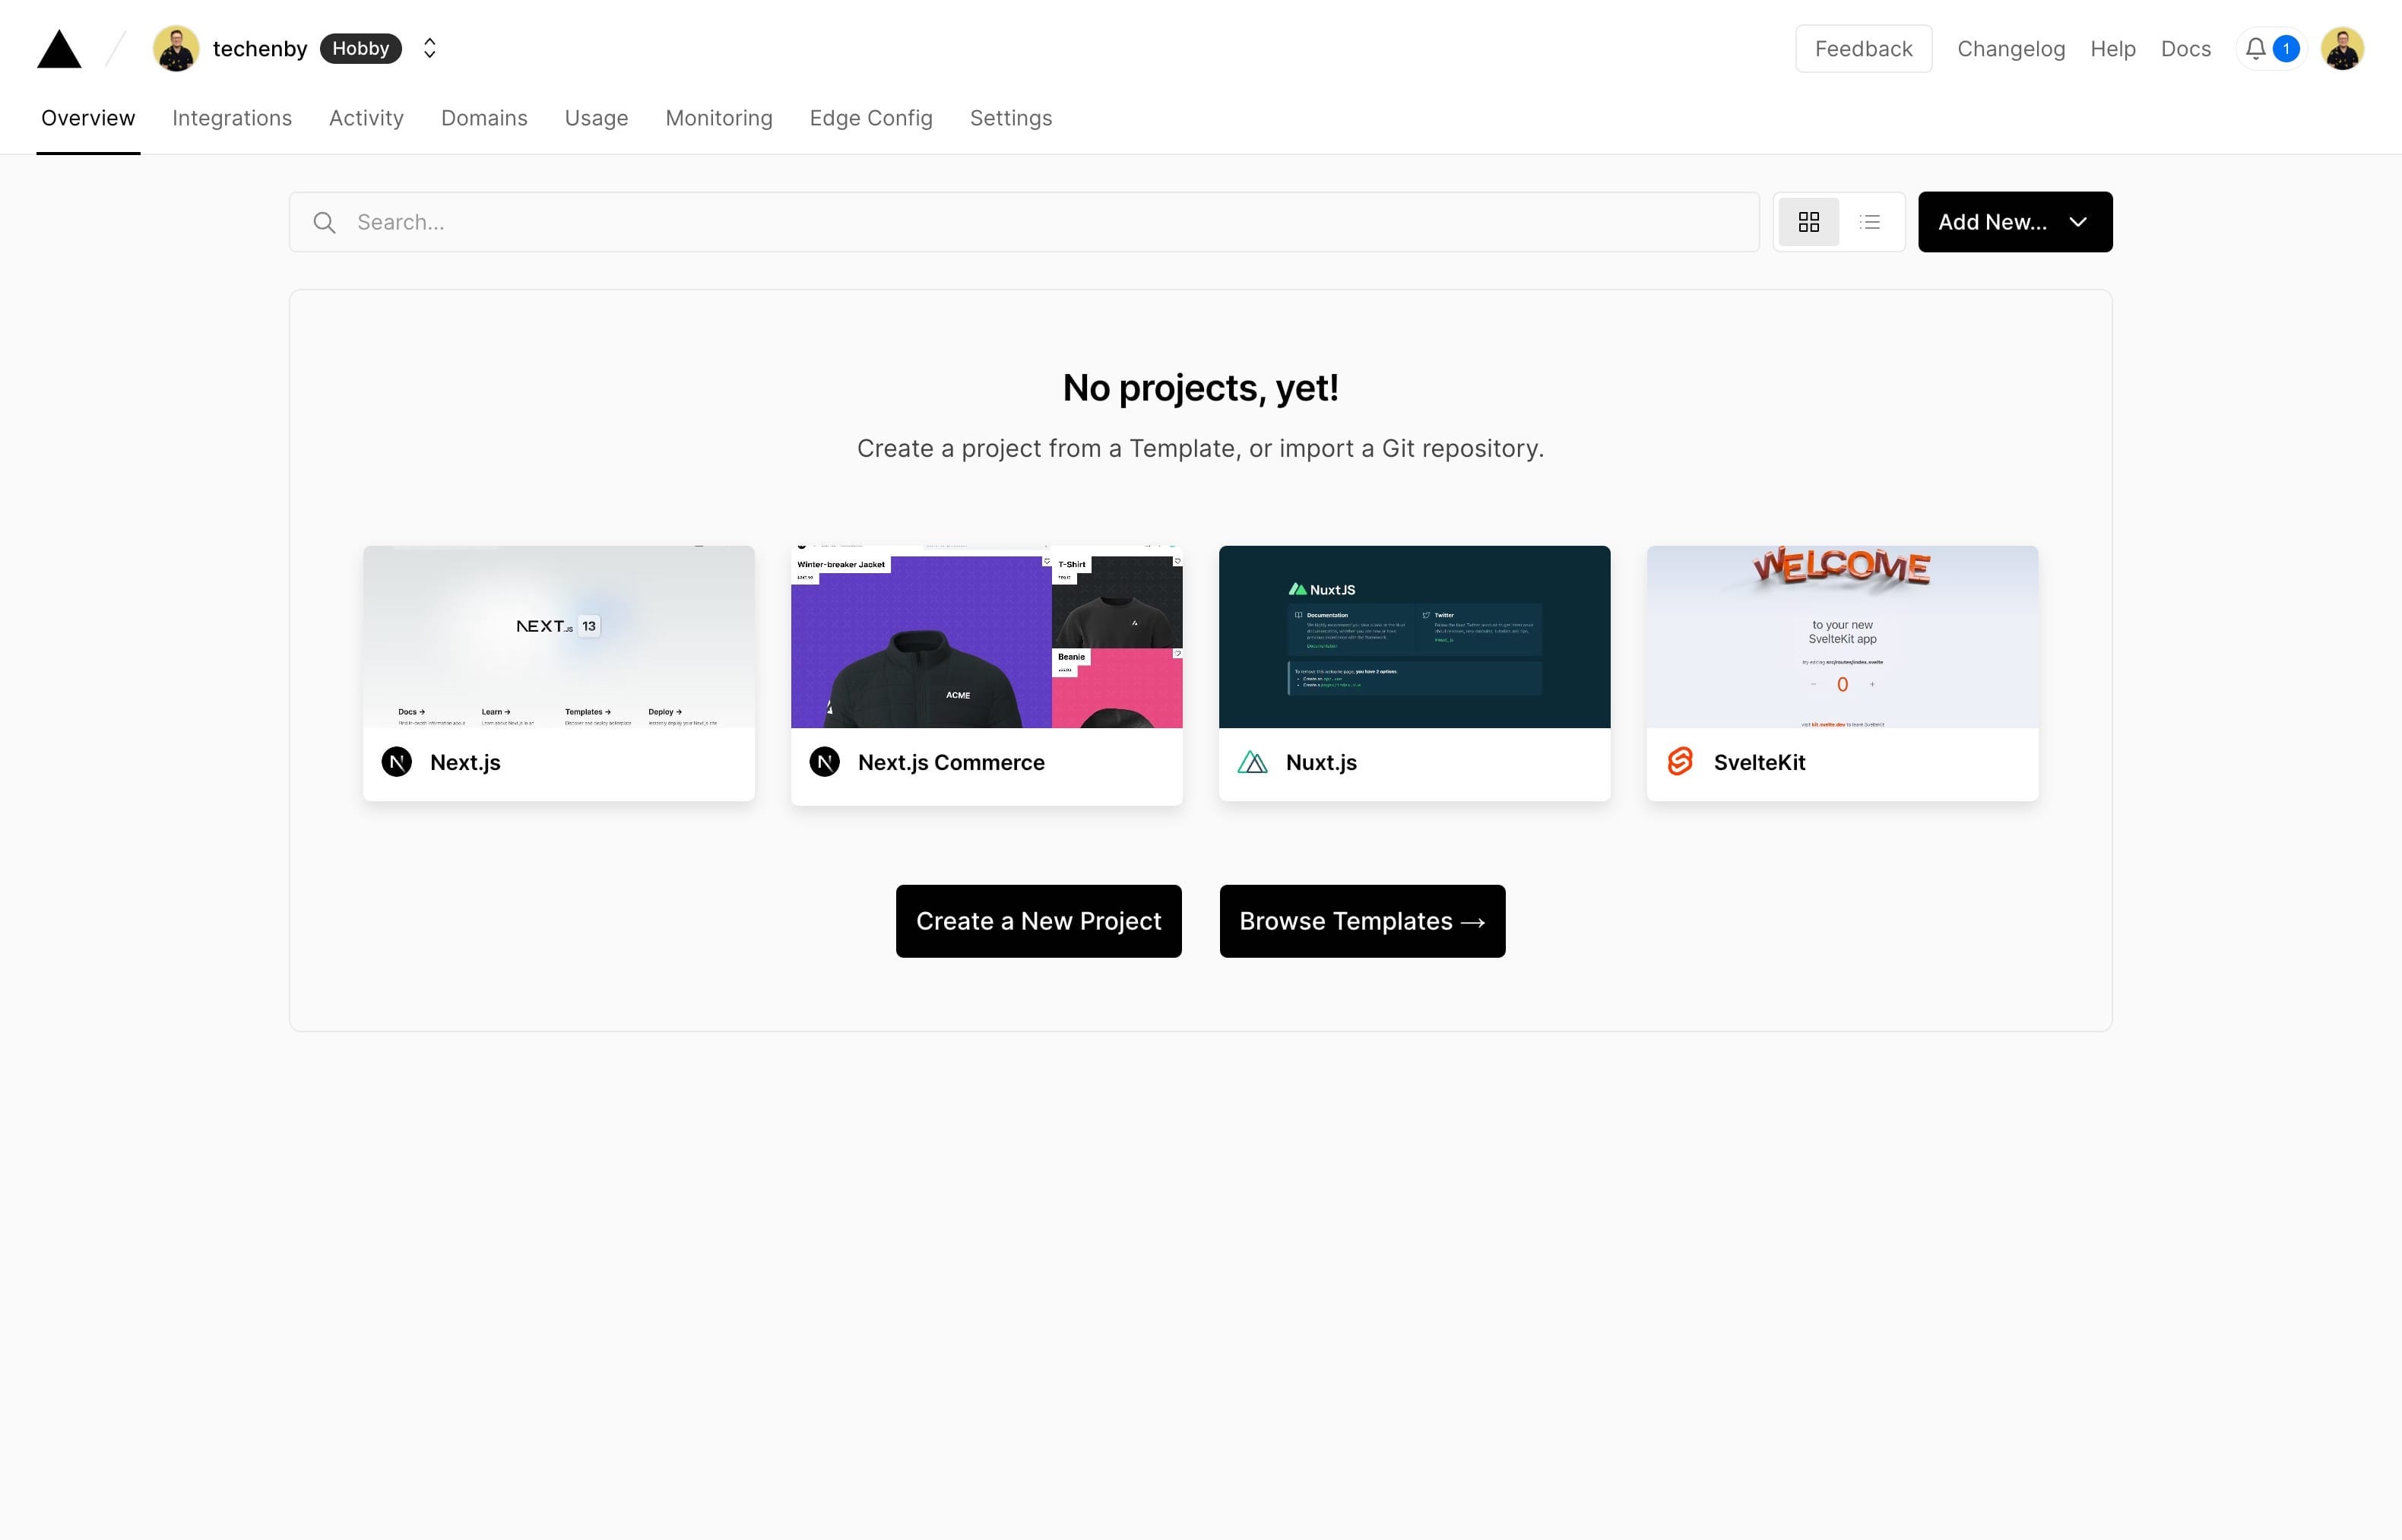
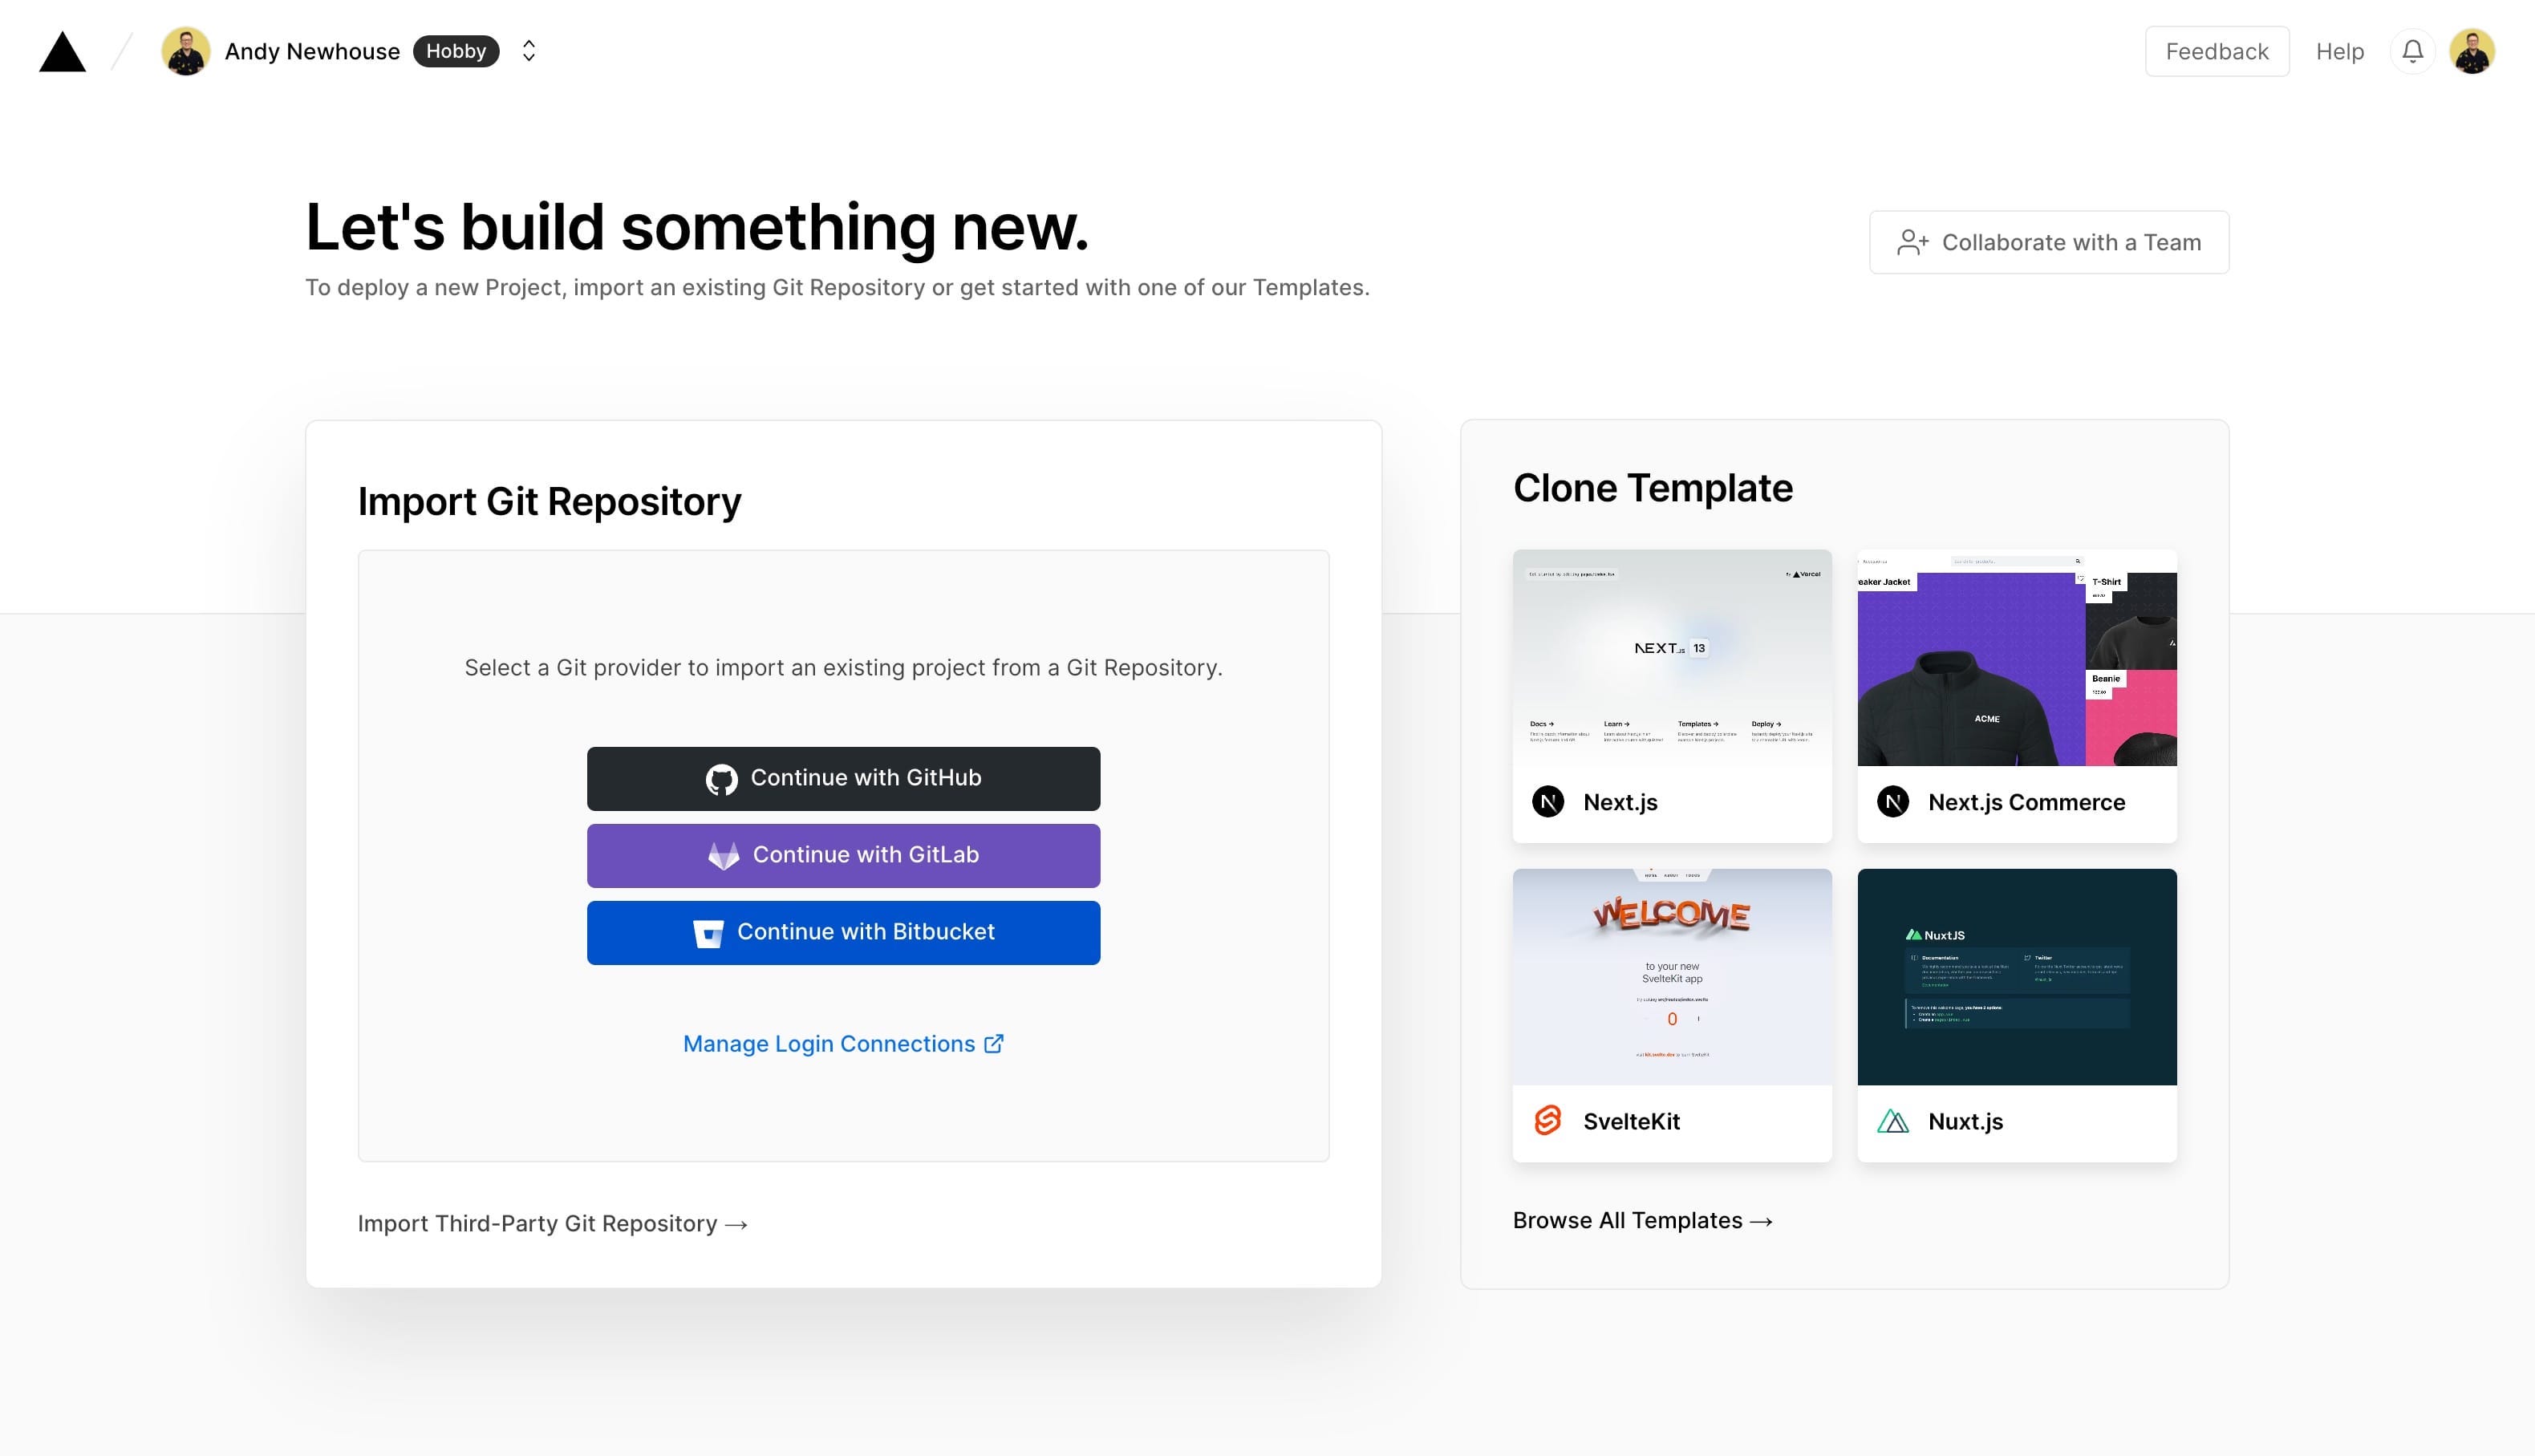
First, we log into our Vercel account, and click "Create a New Project".
https://vercel.com/dashboard
Now, let's connect Vercel to a source provider. For the purposes of this tutorial let's connect to GitHub.
https://vercel.com/new
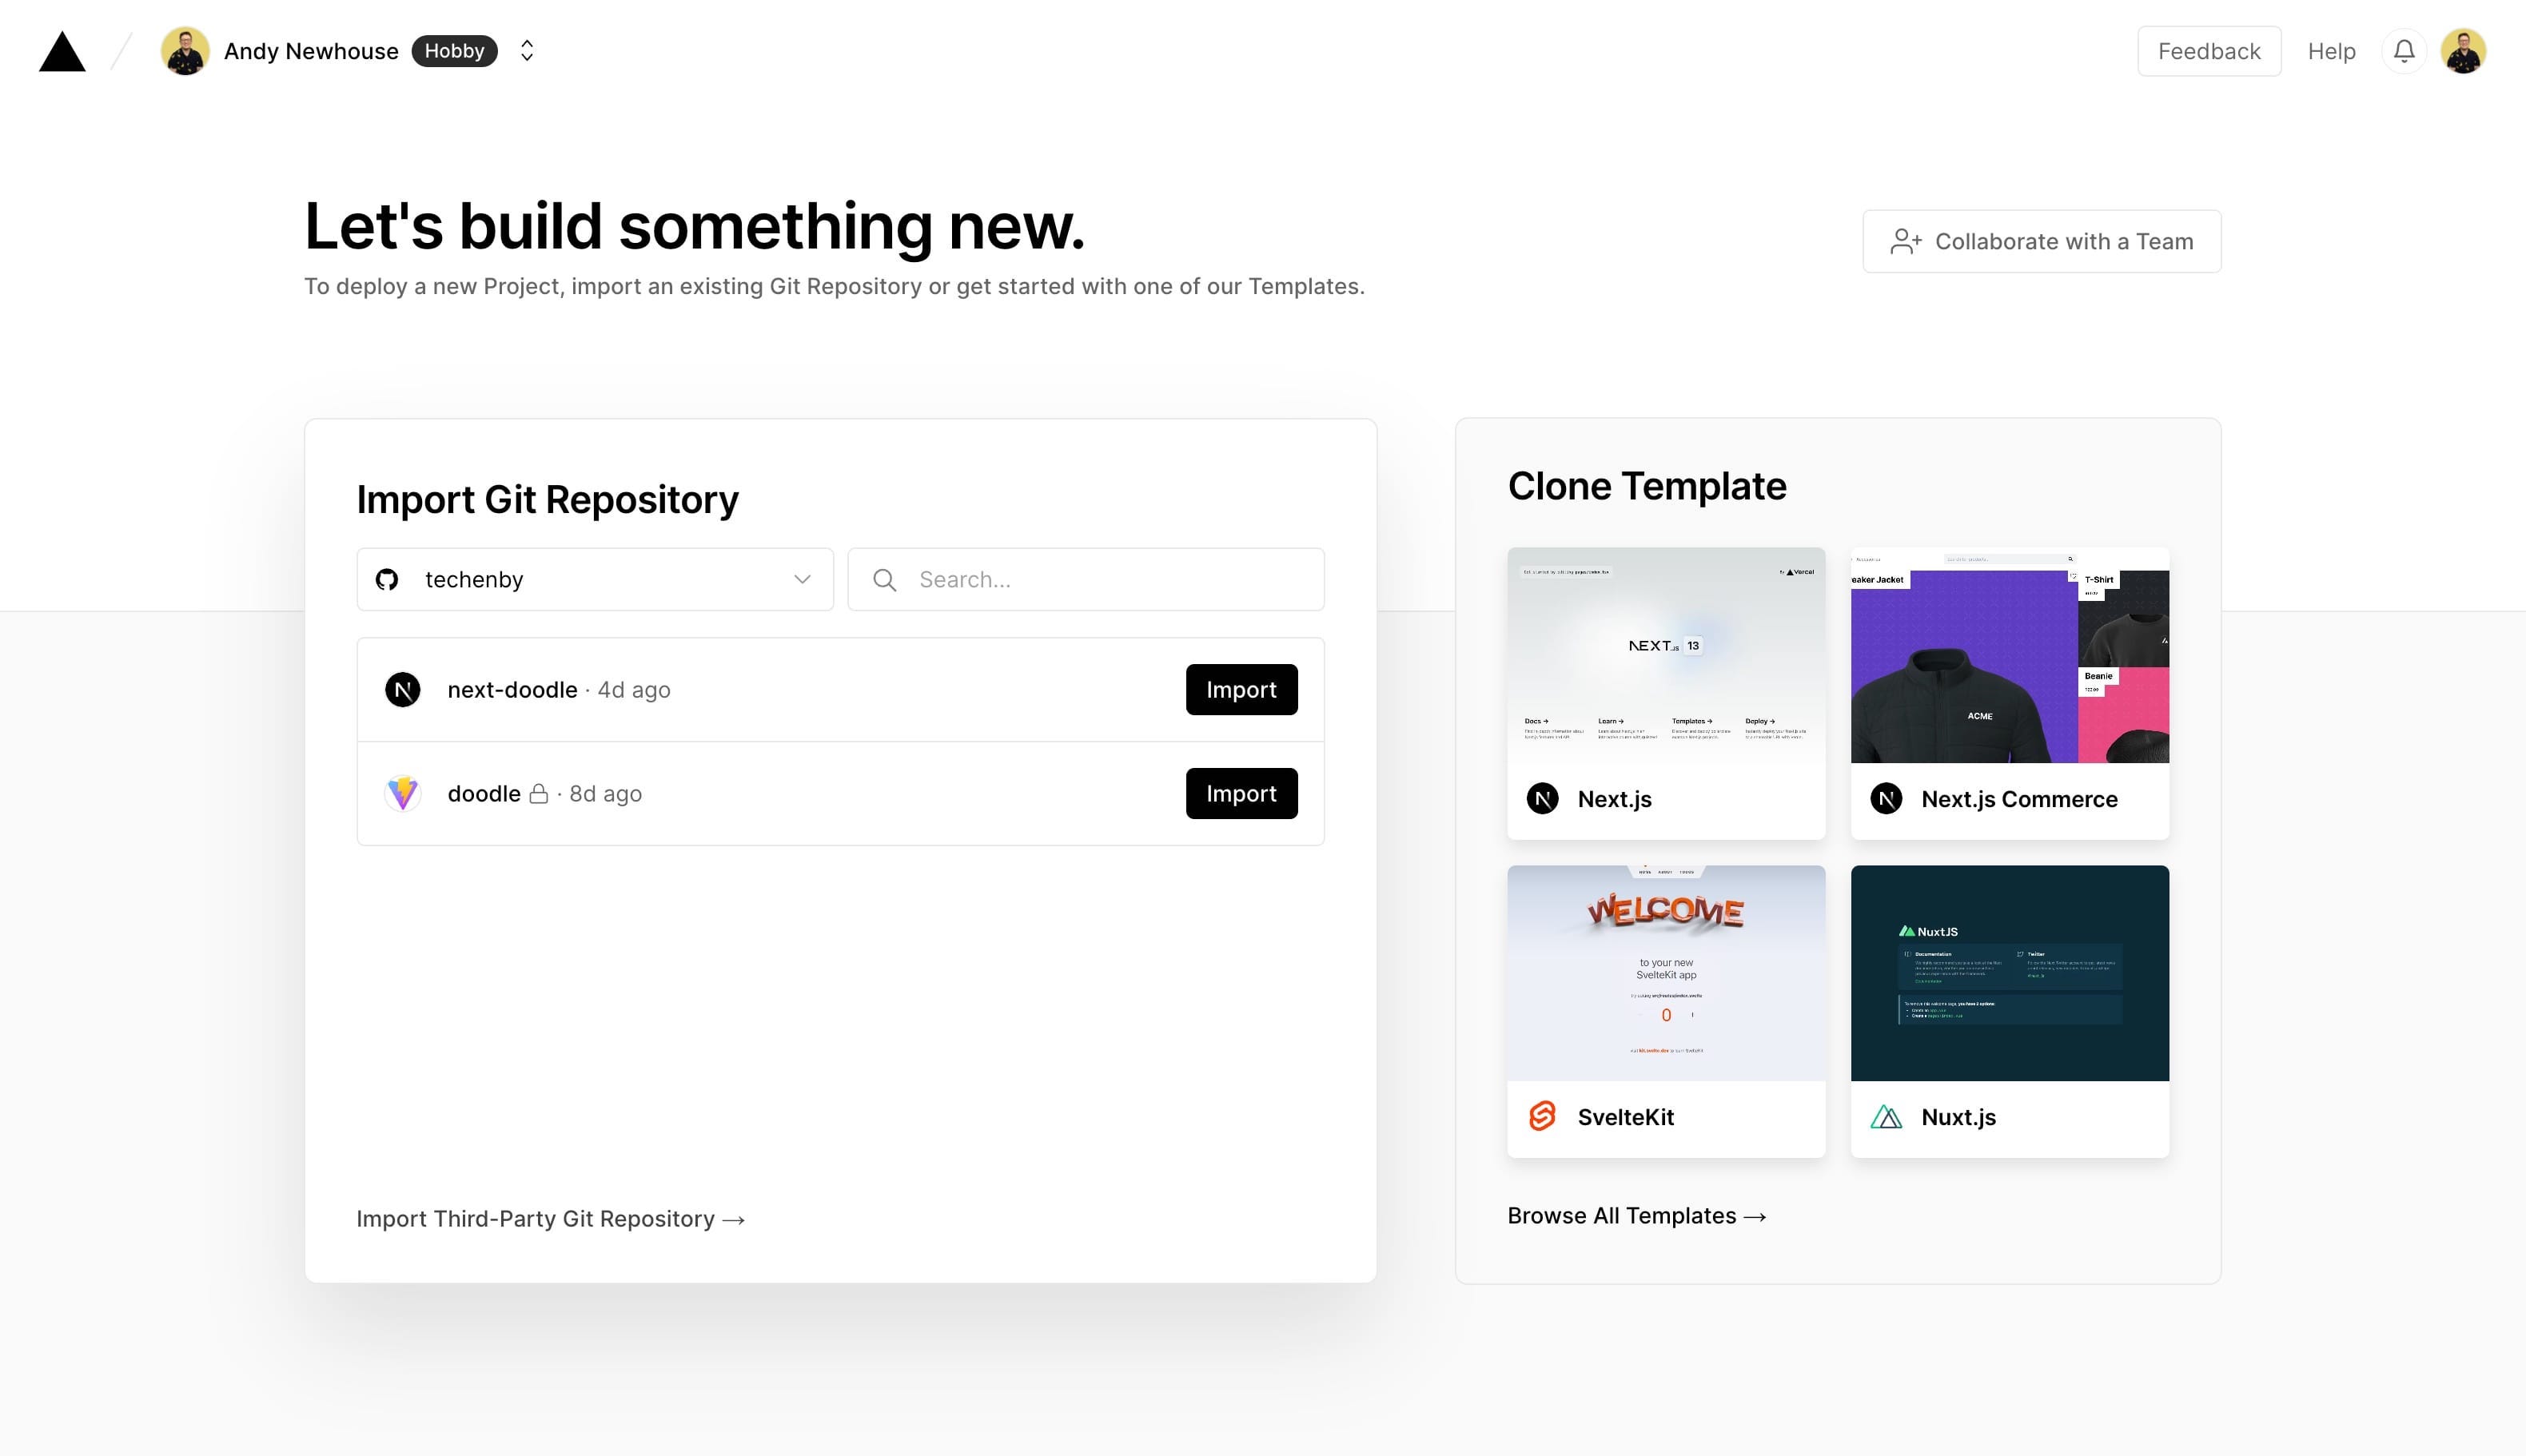
Once GitHub is connected, we can import the next-doodle repository.
https://vercel.com/new
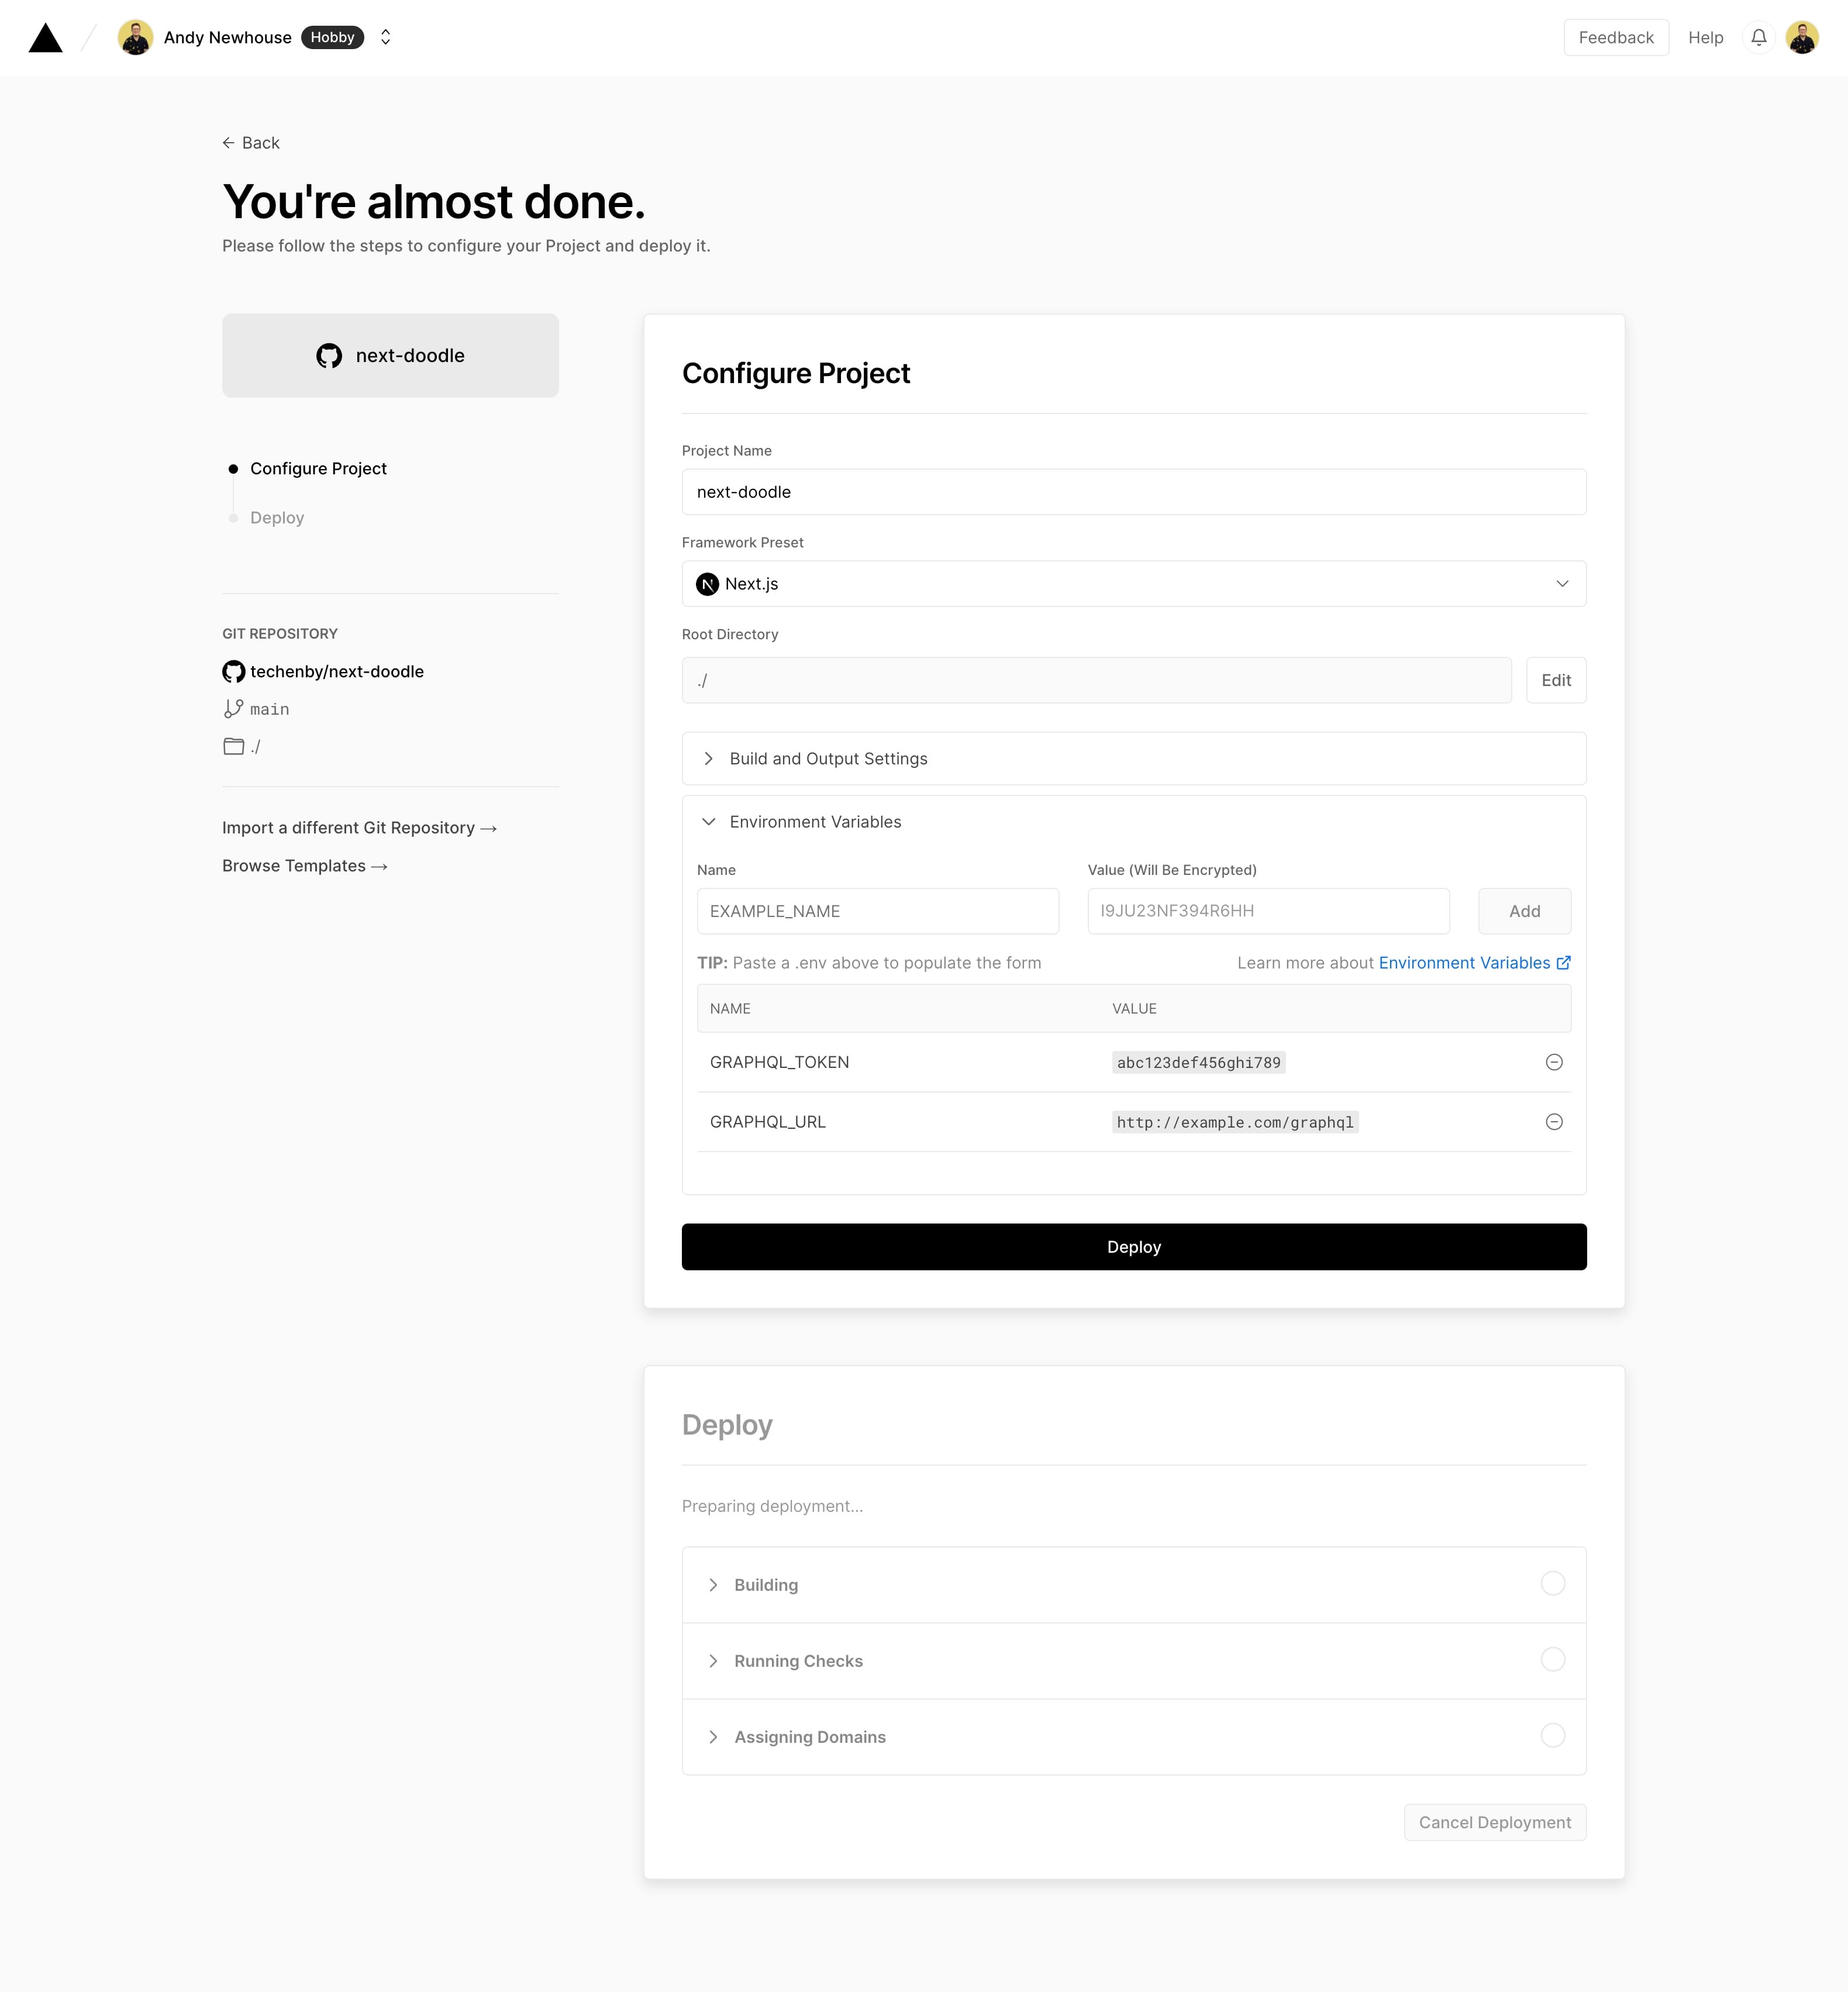
Now we can expand the Environment Variables section, add the GRAPHQL_URL and GRAPHQL_TOKEN with their respective values, and finally click "Deploy".
For testing, if using Laravel Valet, we can run
valet sharefrom thedoodlerepository to get a temporary public URL to use to access our Laravel + EE app from the production Vercel app. In production, of course, we'd use the proper domain instead; e.g.https://doodle.com/graphql.
https://vercel.com/new/import
After Vercel goes through the build process, the page will show a "Congratulations!" screen.
https://vercel.com/new/import
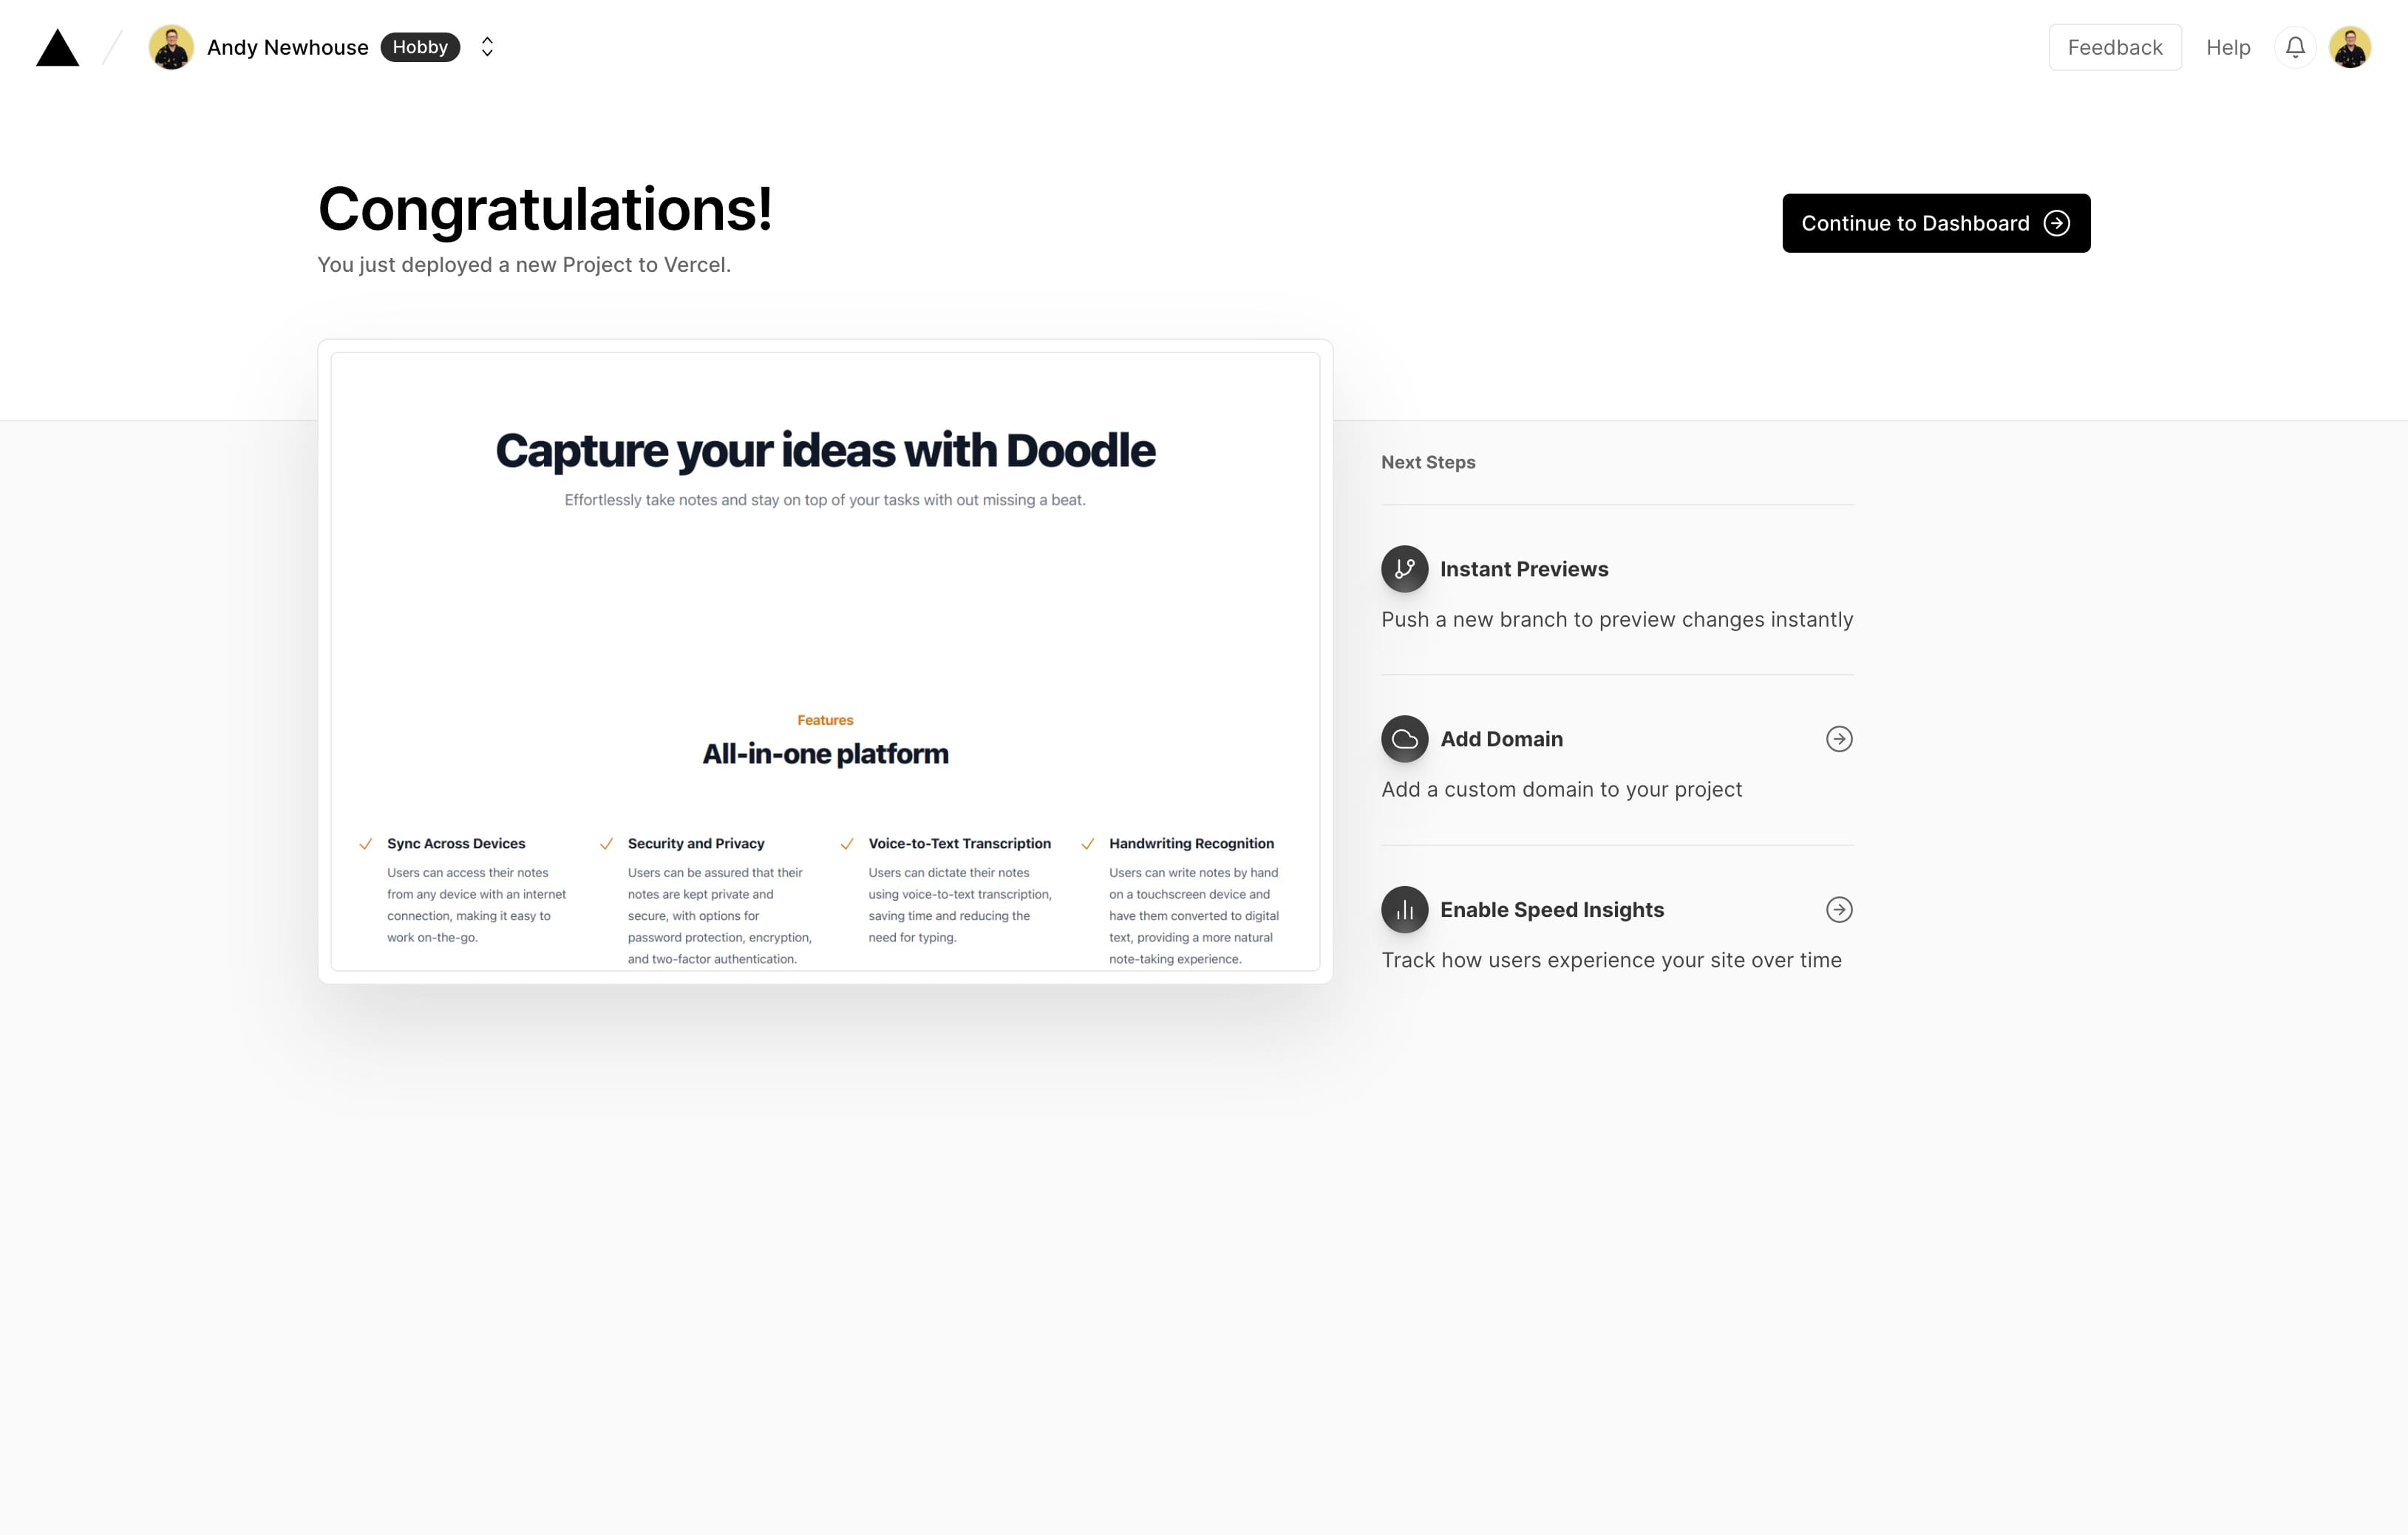
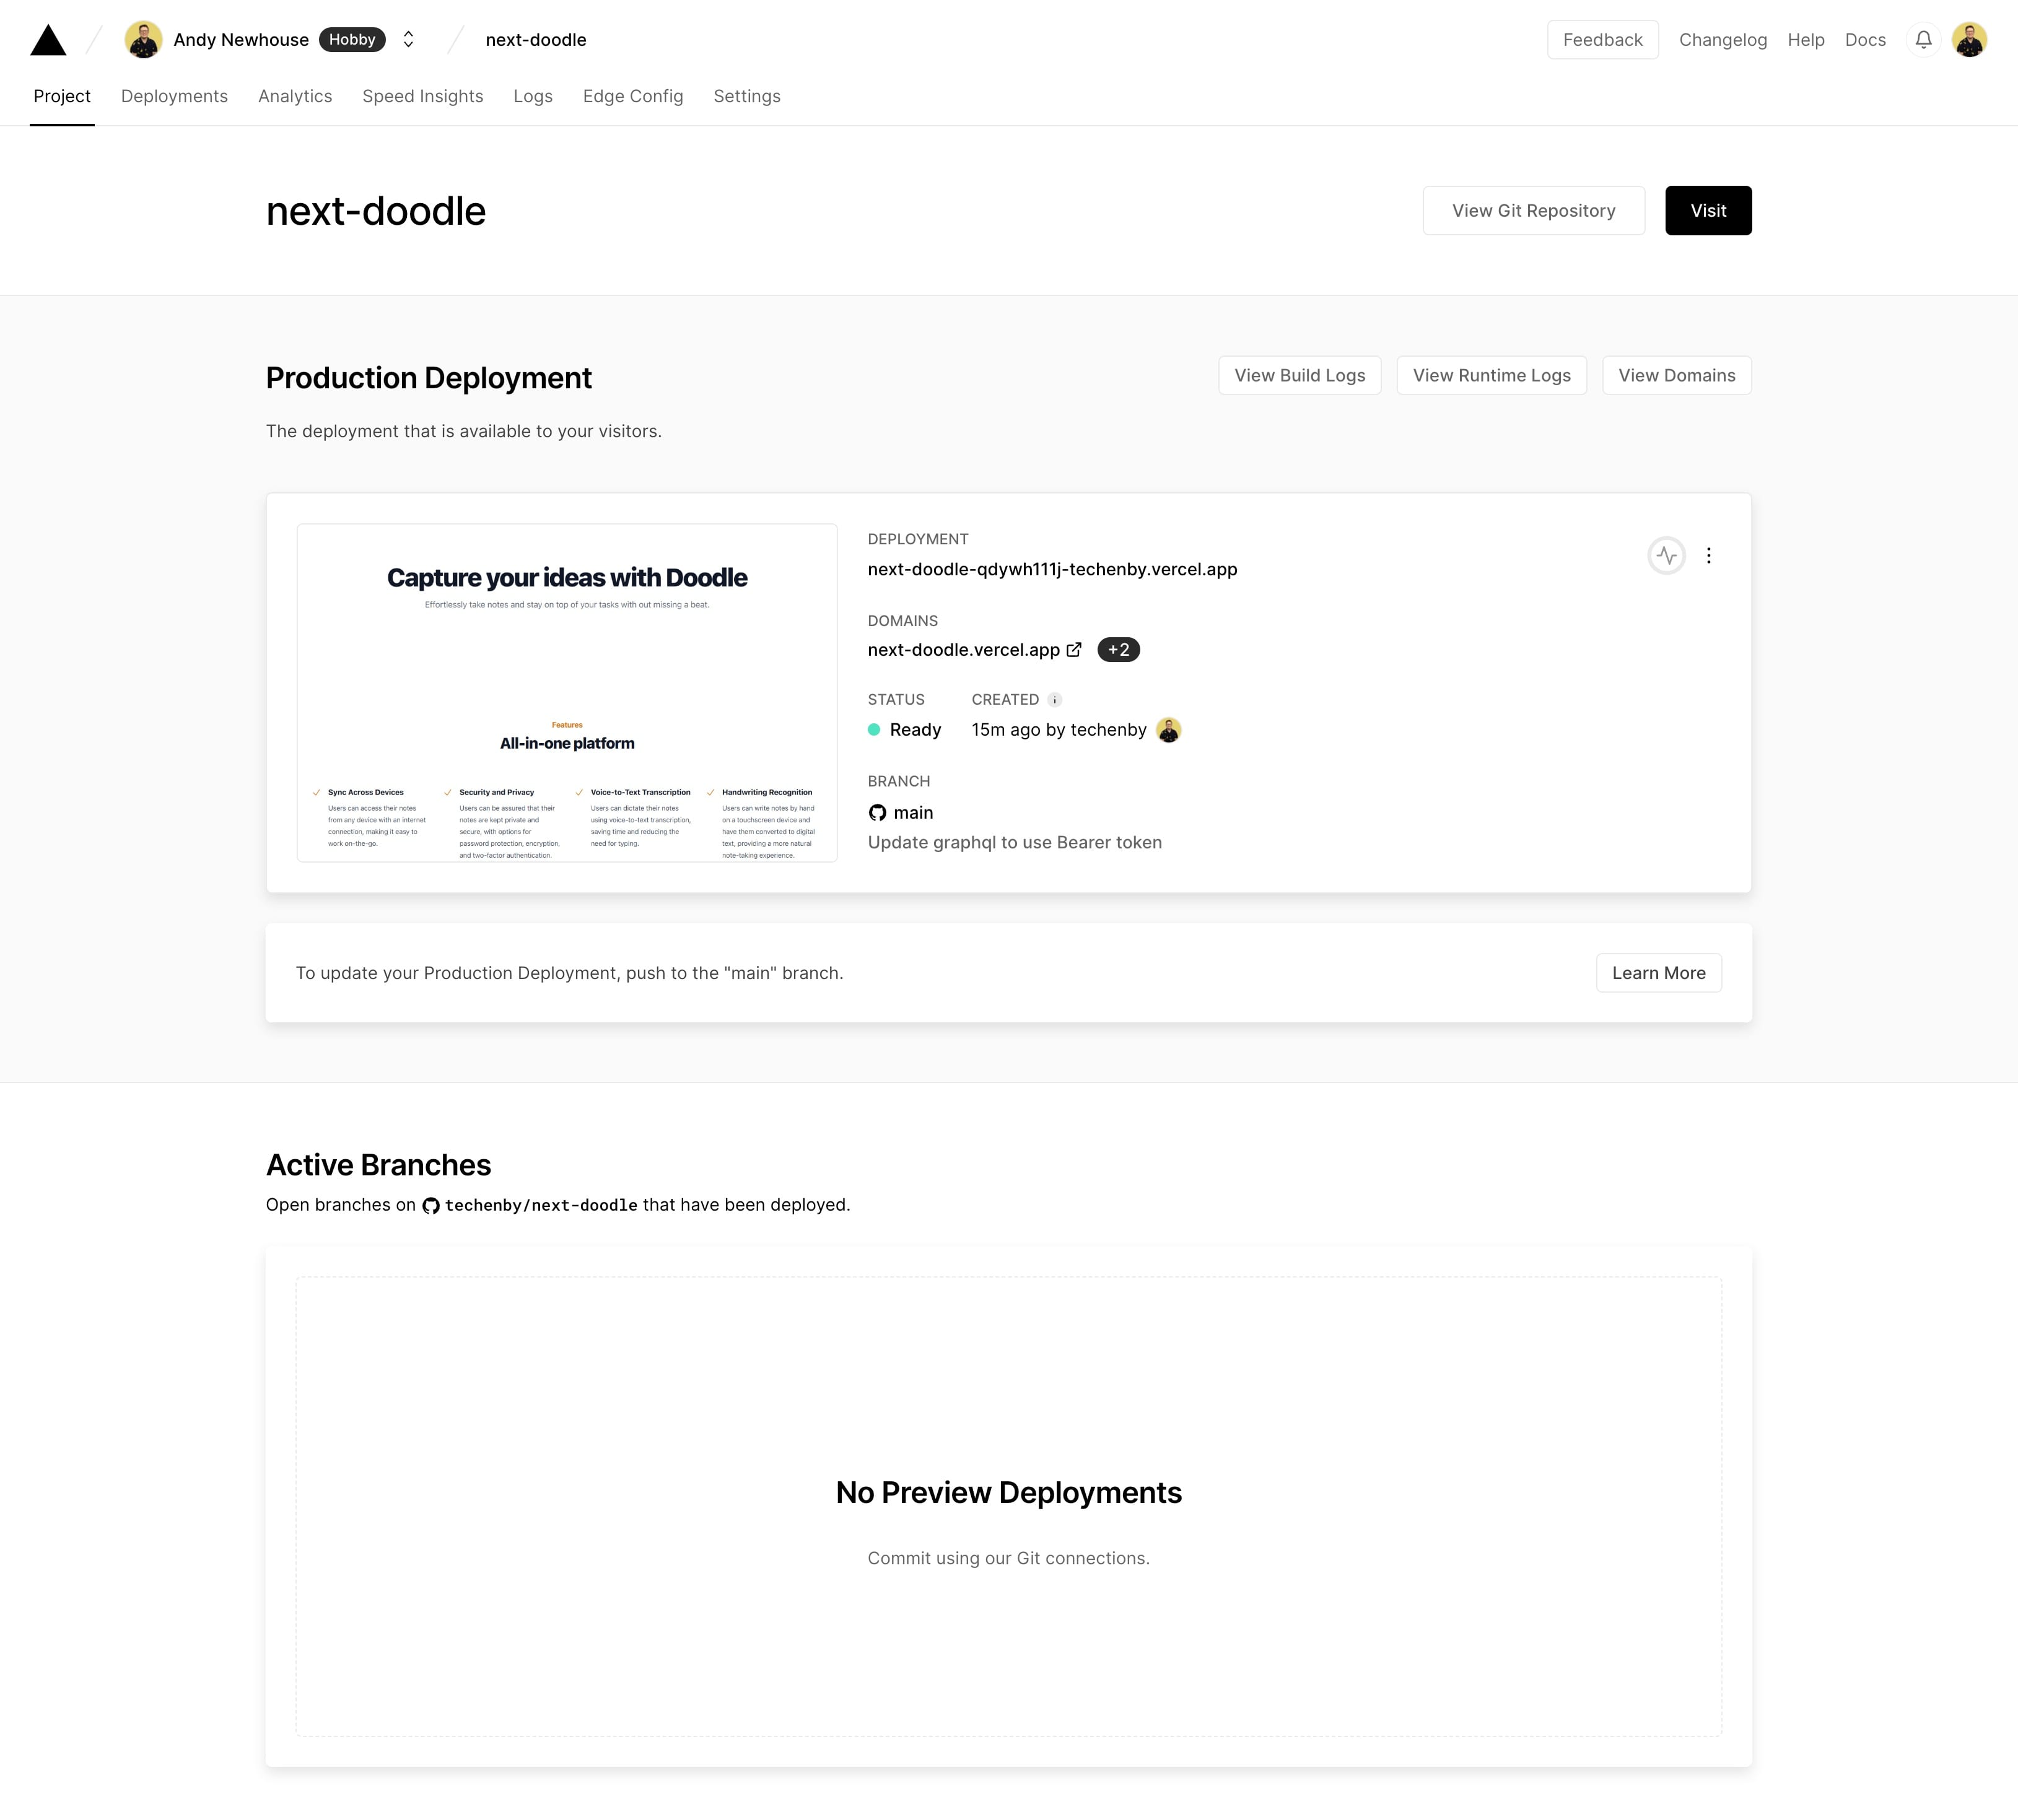
We can then continue to the dashboard, where we can see a URL to view the deployment, as well as options to configure a real domain to serve the project from or enable other Vercel features.
https://vercel.com/techenby/next-doodle
Note: Once your Laravel + EE app is in production, you'll want to generate a new Coilpack GraphQL token on your production app, and use that token when you're pointing your Vercel-hosted Next.js app to your production Laravel + EE URL.
Conclusion
That's it! You've now seen how to take an existing ExpressionEngine site, integrate it with Coilpack, expose its data via GraphQL, build a Next.js site that consumes that data, and deploy the Next.js site to Vercel!
You're headless, serverless, composable, and everything else you've always wanted from your EE sites!
©2023 Tighten Co.