

If you love using Twig templates (or you'd love to try) and want to integrate them into ExpressionEngine, look no further: EE's new tool Coilpack enables Twig templates out of the box. Coilpack makes it possible to use Twig as your templating engine in ExpressionEngine, making it possible to create stunning, customized websites more easily than ever before.
In this blog post, we'll explore some of the key benefits of using Coilpack to integrate your Twig templates into ExpressionEngine, as well as provide a step-by-step guide to getting started.
What is Twig?
Twig is a templating language built by Symfony, the creators of some of the most commonly used PHP packages in the world. It's been around for ages, it's fast (it compiles templates down to PHP code), it's safe (you can allow users to write complex loops and conditionals without touching raw PHP), and it's robust.
Why Use Twig With ExpressionEngine?
- Twig is a powerful and widely adopted templating engine for web development that has gained popularity due to its simplicity, flexibility, and developer-friendly features. Twig is used in popular web development tools like Symfony, Drupal, and Craft, among others, and has become a standard for many modern web projects.
- Twig offers wide IDE (Integrated Development Environment) support, with plugins and extensions available for popular IDEs such as Visual Studio Code, PhpStorm, Sublime Text, and Atom. These plugins provide features like syntax highlighting, auto-completion, code snippets, error highlighting, and debugging tools, making it easier for developers to work with Twig templates.
Getting Started With Coilpack
If you haven't set up an ExpressionEngine site with a Laravel+Coilpack app hooked up to it yet, check out our tutorial Adding ExpressionEngine to a Laravel App with Coilpack.
However, here are the quick basics, if you have an existing ExpressionEngine site and want to add Twig quickly and easily:
- Create a new Laravel app in a directory parallel to your ExpressionEngine site:
composer create-project --prefer-dist laravel/laravel your-laravel-app-name - Change into that directory:
cd your-laravel-app-name - Install Coilpack:
composer require expressionengine/coilpack:1.x && php artisan coilpack - Choose existing installation, and point it to your existing EE site
- Add these two entries to your
.gitignorefile:ee/system/user/cache/*andee/system/user/logs/* - If you're not using a tool like Valet to serve your sites, run
php artisan serveand view your site athttp://localhost:8000/
At this point you should have a Laravel app, using Coilpack to serve all of your ExpressionEngine routes.
Using Twig Templates
To start using Twig templates in your ExpressionEngine site, create a new file with .html.twig as its file ending.
For the sake of this demo, you can make a new file at your-laravel-app-name/ee/system/user/templates/default_site/example.group/index.html.twig. Grab the code snippet provided below and paste it into the new file.
<html> <head> <meta charset="UTF-8" /> <meta name="viewport" content="width=device-width, initial-scale=1.0" /> <title>{{ global.site_name }}</title> <script src="https://cdn.tailwindcss.com"></script> </head> <body> <div class="px-4 mx-auto text-center max-w-7xl sm:px-6 lg:px-8"> <div class="max-w-4xl mx-auto"> <h1 class="py-8 text-3xl capitalize">Welcome to {{ global.site_name }}!</h1> </div> </div> </body></html>From here you should be able to view your page at your-laravel-app-name.test/example:

Now let's create another Twig template to render blog posts at your-laravel-app-name/ee/system/user/templates/default_site/_partials/blog.html.
We'll make this blog partial show all of the open blog posts. Grab the following code and paste it into the new file:
<div> <h1 class="my-8 text-4xl font-bold text-center">Blog</h1> {% set blogEntries = exp.channel.entries({channel:'blog', status: 'open'}) %} <div class="grid grid-cols-3 gap-3"> {%- for entry in blogEntries -%} <div class="h-40 p-6 bg-gray-100 rounded-lg"> <h3 class="text-2xl"> {{ entry.title }} </h3> <p>{{ entry.description }}</p> </div> {% else %} <p class="col-span-3">Sorry, no blog entries were found.</p> {% endfor %} </div></div>To pull this partial into our original template, add this line below the <h1> in the body:
{% include 'ee::_partials/blog' %}That'll make it look like this:
<html> <head> <meta charset="UTF-8" /> <meta name="viewport" content="width=device-width, initial-scale=1.0" /> <title>{{ global.site_name }}</title> <script src="https://cdn.tailwindcss.com"></script> </head> <body> <div class="px-4 mx-auto max-w-7xl sm:px-6 lg:px-8"> <div class="max-w-4xl mx-auto"> <h1 class="py-8 text-3xl capitalize">Welcome to {{ global.site_name }}!</h1> {% include 'ee::_partials/blog' %} </div> </div> </body></html>If you navigate back to your-laravel-app-name.test/example, you can now see the blog output:

That's it! Now go ahead and add some content to see the final rendering:
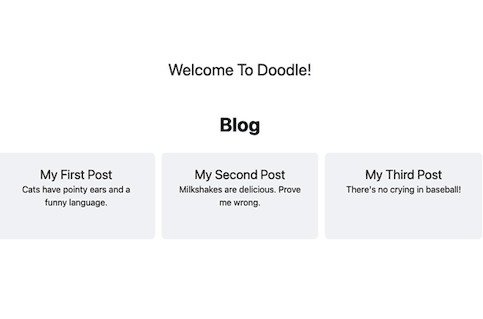
Next steps
You're now up and running using Twig in your templates! Want to learn more? Check out the Twig for Template Designers section of the Twig docs.
©2023 Tighten Co.